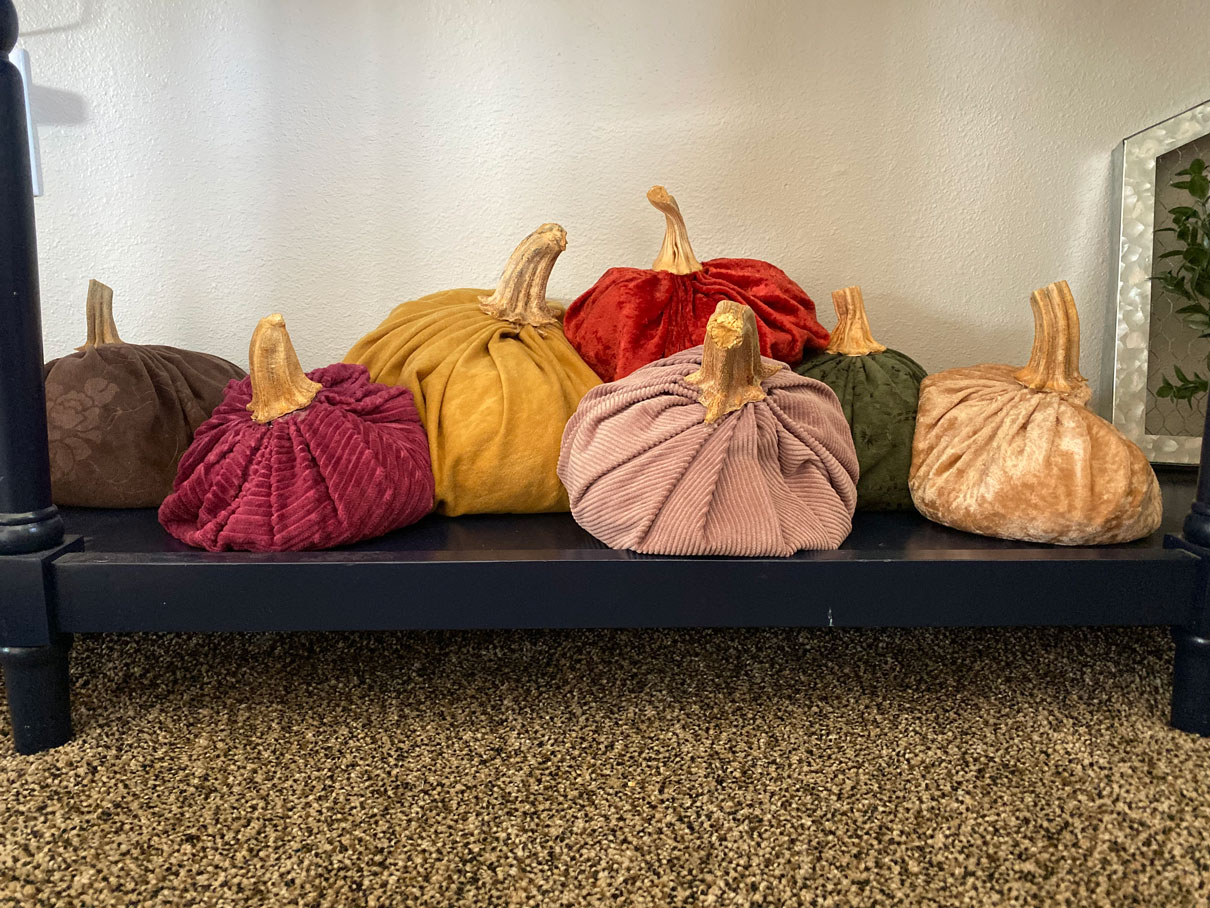
I went and visited a friend the other day and she had the most ADORABLE FABRIC PUMPKIN DECORATION! Seriously! They were so cute and I then asked her how she made them which made me love them even more. They are ridiculously easy to make with little to no talent! Trust me…
These pumpkins were so easy that I made this into an activity with my boys and taught all about circles while we were doing it. We discussed what the circumference of a circle is along with what the diameter and radius is. You can also read to them these fun children’s books of Sir Cumference . My boys love these stories that teach different math elements.
Fabric Pumpkin Decoration
Here is what you need to make your own Fabric Pumpkin Decoration:
- Your choice of material
- Scissors
- Ruler
- Thread and Needle
- Rice or Beans or these Styrofoam Beads (Styrofoam beads make the pumpkins not so heavy)
- Pumpkin stem or other alternative (corn stalks, sticks)
- Glue Gun
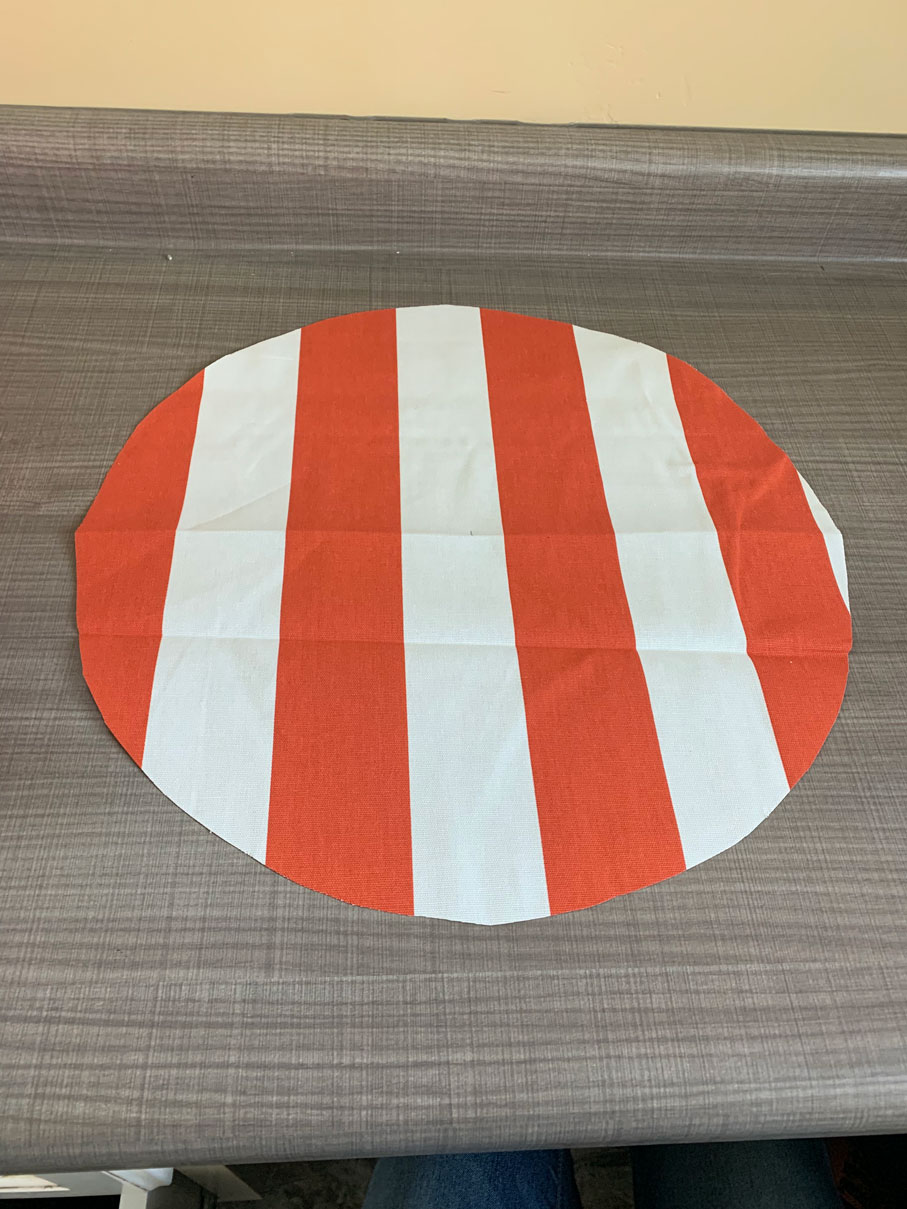
Step #1 – Cut out a circle of any size.
Beware! You might be thinking you are creating a big pumpkin when in fact it turns out smaller than you think. The pictures of the pumpkin below has a 18 inch diameter which was the size I was needing for my fireplace mantel. I found it easiest to fold your material in half and on the fold make a small mark that acts as the center of your circle. From that mark measure 9 inches and create little marks.
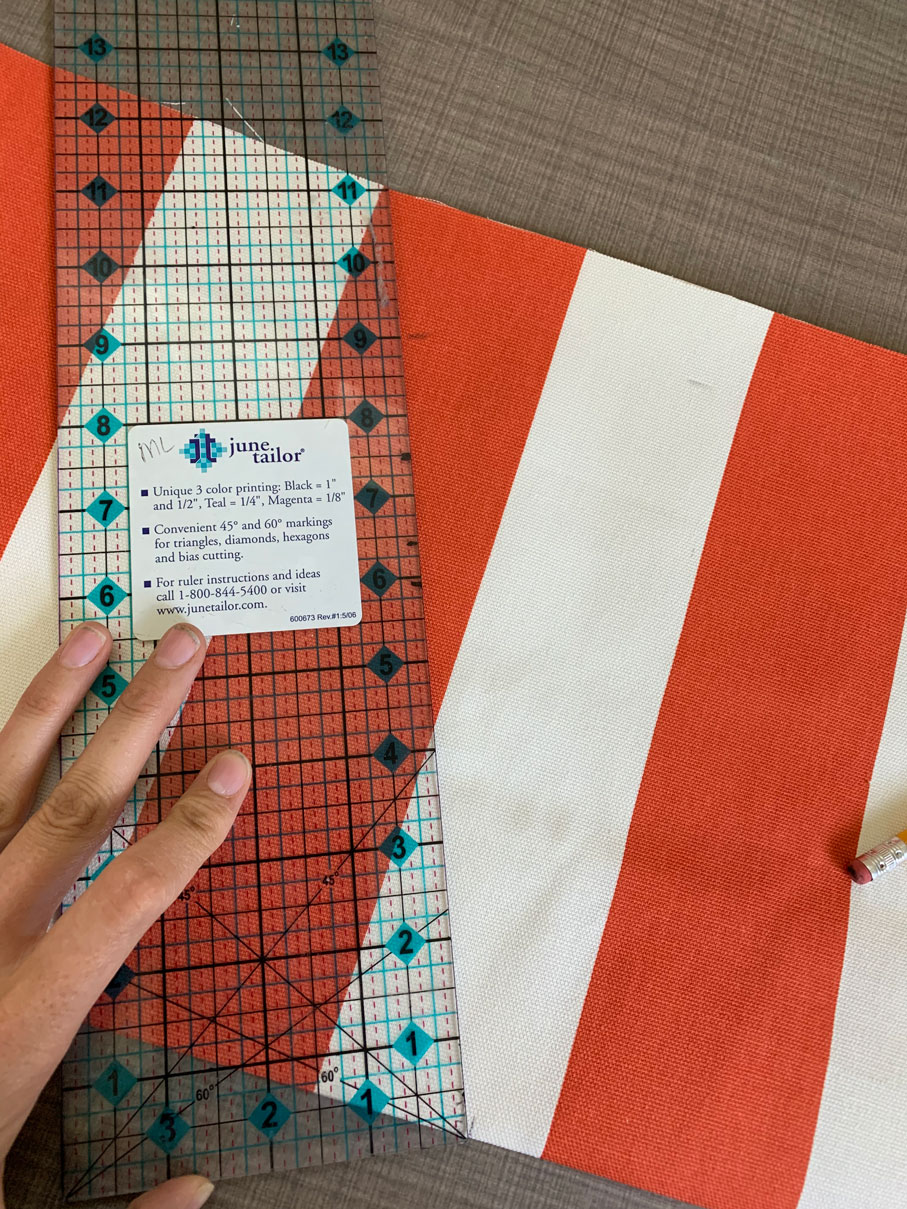
Then take some scissors and cut along the lines you created. This is a simple way to get any size of pumpkin you want. Don’t worry if it isn’t perfect. That won’t matter at all.
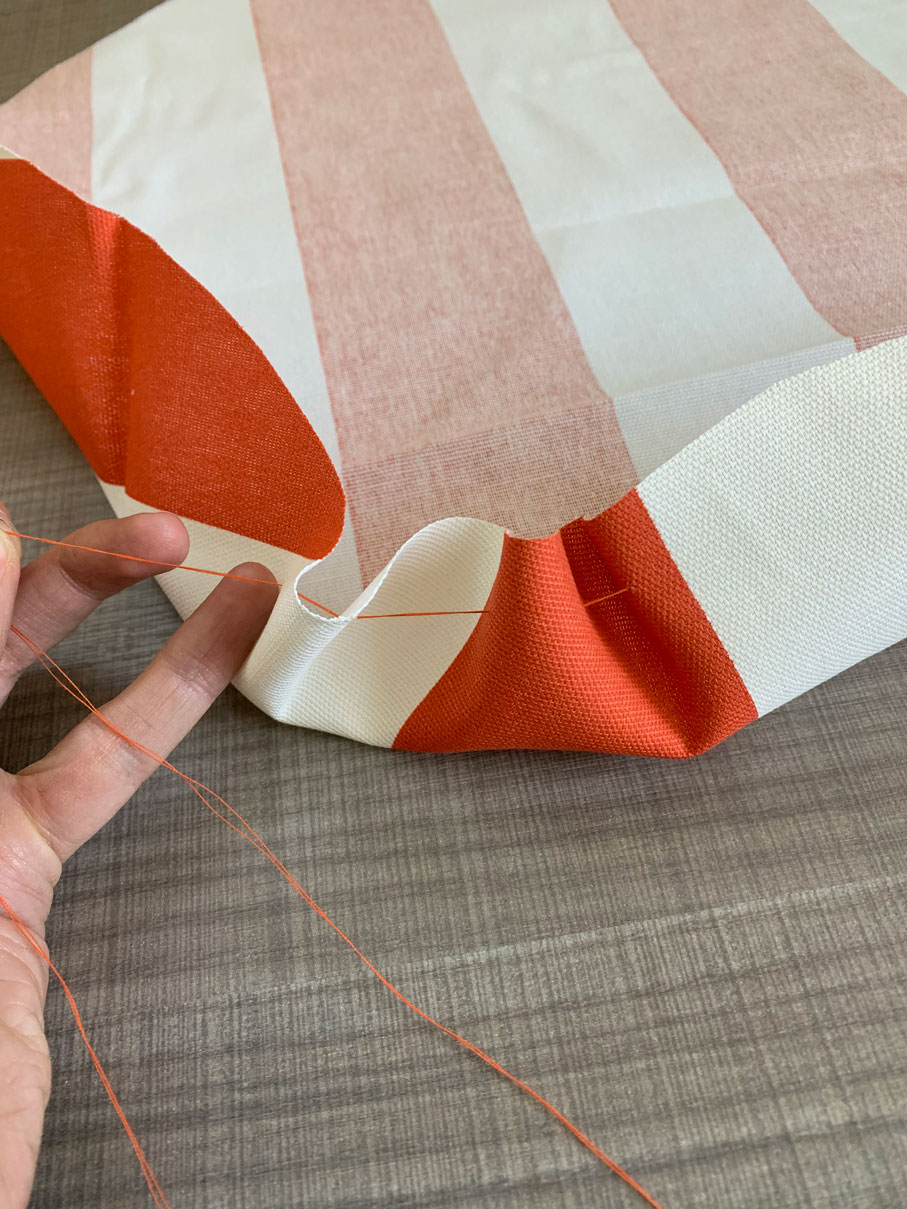
Step #2 – Get needle and thread and begin to make a slip stitch
This is easy and fast. Double up the thread to make it stronger and tie a knot at the end. Insert the edge of the pumpkin about 1/2 inch from the edge making sure the knot is on wrong side of the fabric so it won’t show.
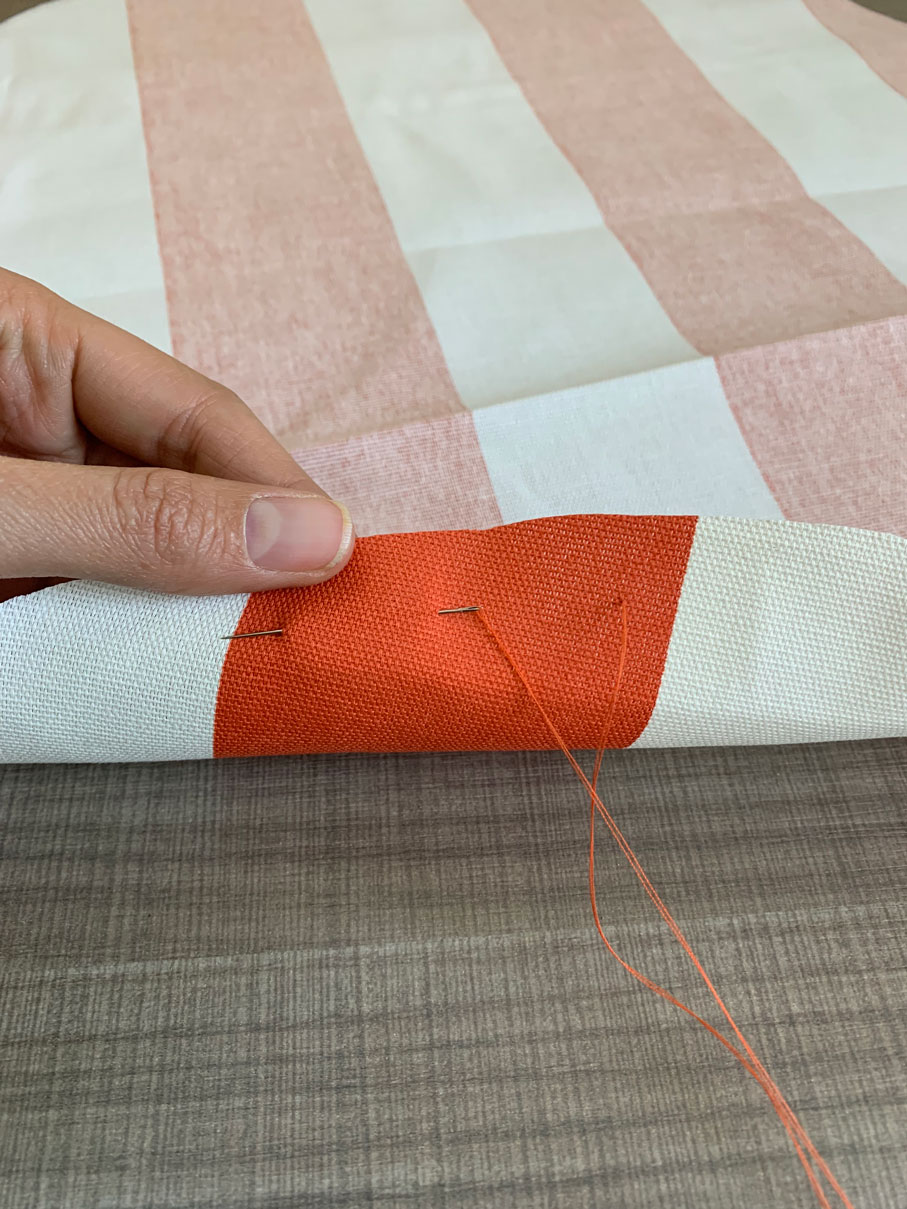
Now about every inch go all the way and create your slip stitch, pulling as you go. It will create these ruffles as you continue around the circle.
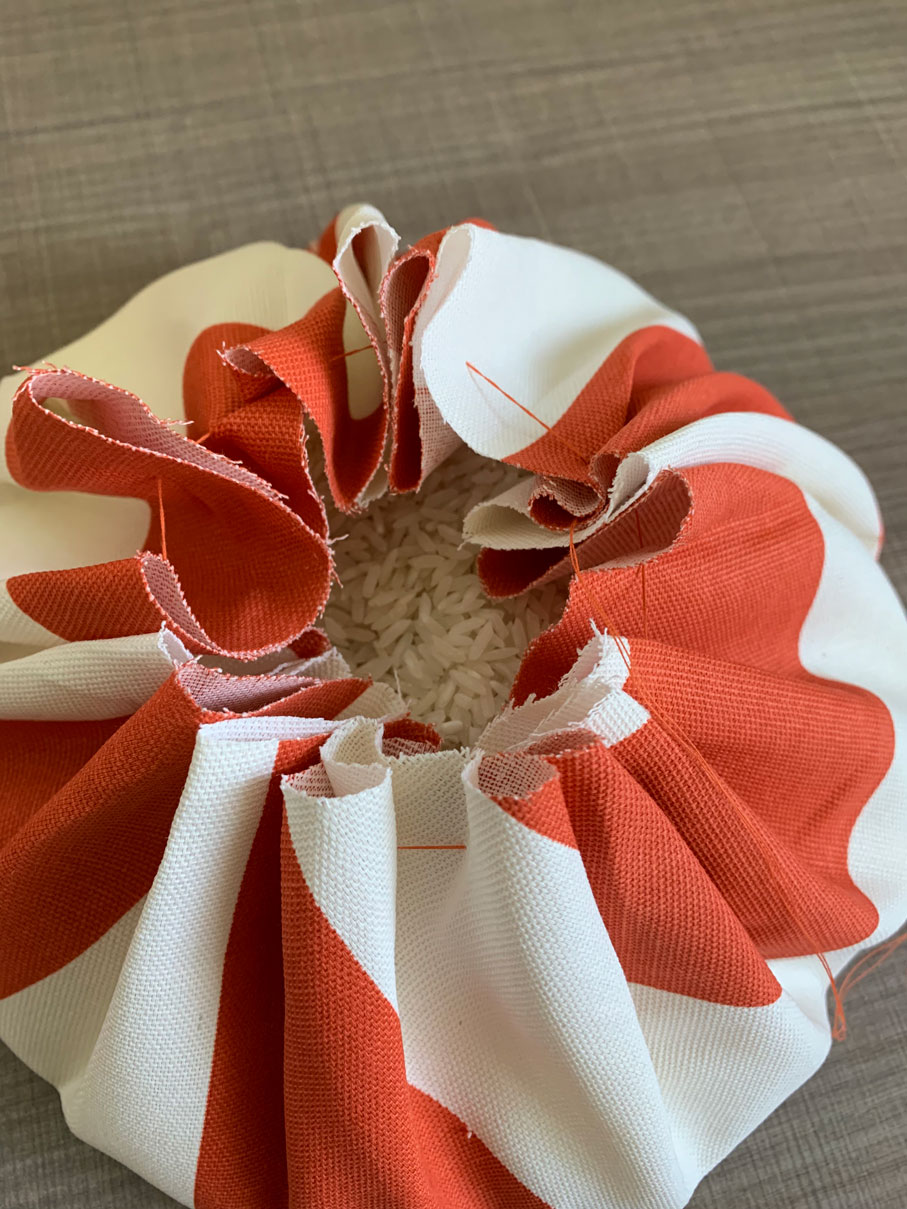
Step #3 – Finish your slip stitch, pull tight leaving a small opening and fill the pumpkin up with rice or beans.
Once you are done going all of the way around your circle, pull the thread tight and leave a small opening so you can put in beans or rice. I ordered these styrofoam beads to fill the pumpkins up with to see if I like it better. The beans and rice make the pumpkins heavier than I like.
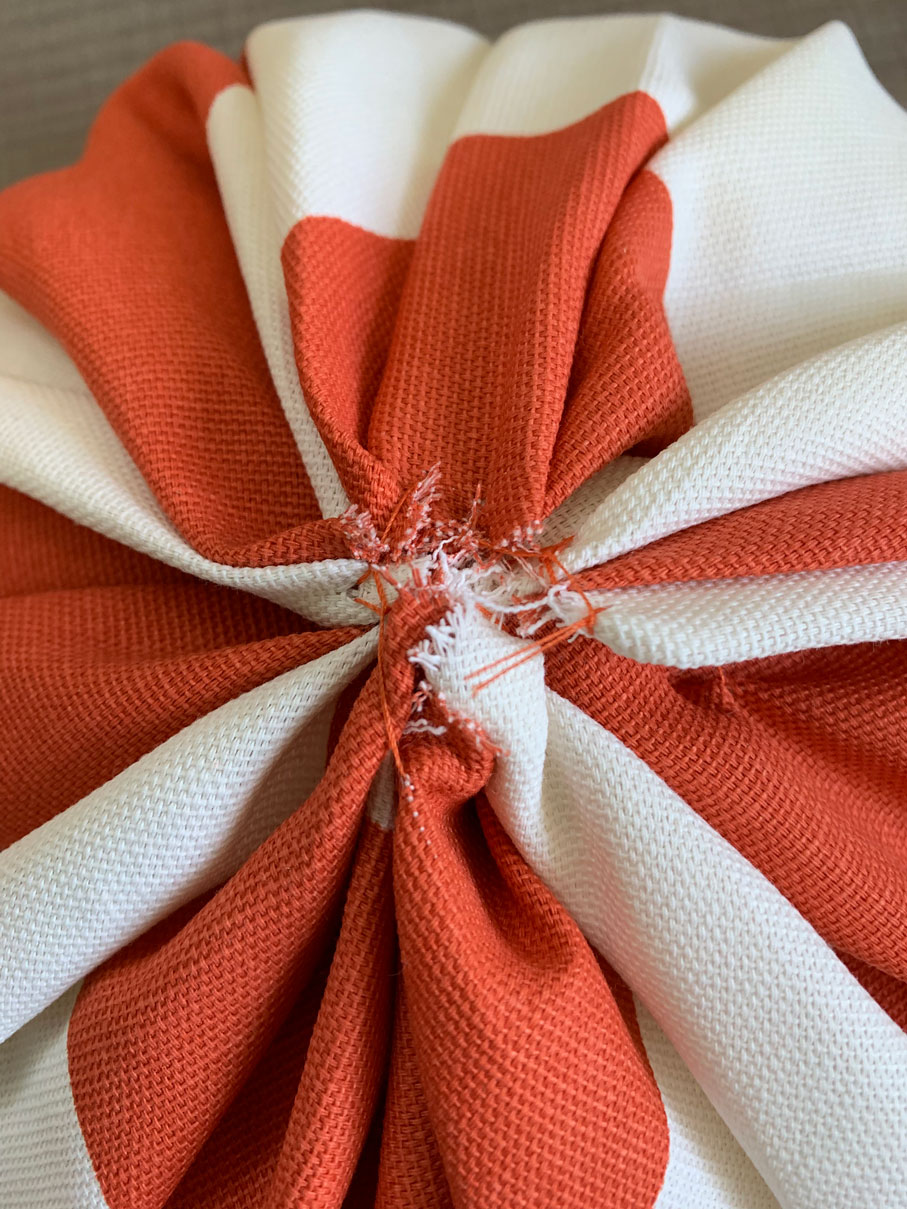
Step #4 – Close the opening and sew it closed
Take your needle and thread and go back and forth across the opening of the pumpkin to securely close it. I did quite a few stitches because I know my kids will play with them so I wanted them durable.
Step #5 – Glue a stem onto your pumpkin.
You can find pumpkin stems at pumpkin patches, the bottom of pumpkin boxes. Use old pumpkins or squash that you have grown in your garden. I had a couple old fake pumpkin stems that I used for a couple of my pumpkins. I didn’t have very many of those, so I improvised. You can use a stick and shape it into a stem. I used cornstalks from my garden and I think they work great!

That is it!! These pumpkins are also great for centerpieces as well as great decorations all over your house! I love them.
Here are also some easy and fun bat decorations that you can plaster all over your wall. Looking for some great refreshments for your Halloween Party? Here are some great options with FREE PRINTABLES. If you want to start a fun Halloween Tradition check out MR BONEZ as the new elf on the shelf for Halloween
PIN FOR LATER
