Do you remember the difference between an igneous, metamorphic and sedimentary rock? I didn’t until just recently when our science group started learning about rocks. I found that this simple activity was the best way for my kids to understand the differences between the 3 rock types: sedimentary, igneous, and metamorphic.

This activity brings auditory, visual and kinesthetic learning all together. They get to hear the the difference between the 3 rock types, see pictures of the 3 rocks types, as well as build the 3 rocks types. This type of learning is my favorite not only for myself but for my boys.
I get excited about sharing these types of activities that leave an impression on my boys. Here is what you need for this activity
Supplies you need for this ROCK TYPE activity
- 4-6 different colored crayons (depending on your size of group will depend on how much. We had 8 kids and I had 5 crayons of 5 different colors)
- Blender or something to create crayon shavings
- Tin Foil
- Tin Foil Cupcake liners – optional, you could just use tin foil instead.
- Cupcake pan
- Oven
- Paper the kids can color
Step #1 – Blend or find a way that works best for you to create crayon shavings
I played around with this to find the easiest method. I’m all about easy! I found the blender is the easiest. I have a Blendtec and it created great shavings. Another trick? I didn’t even take the paper off of the crayons. I blended them all together and then emptied the shavings and papers all on a plate. You can kind of shake around the shavings and the paper will float to the top.
Don’t worry about getting all of the pieces of paper out. It worked just fine with some in. Here are my 5 plates of shavings.
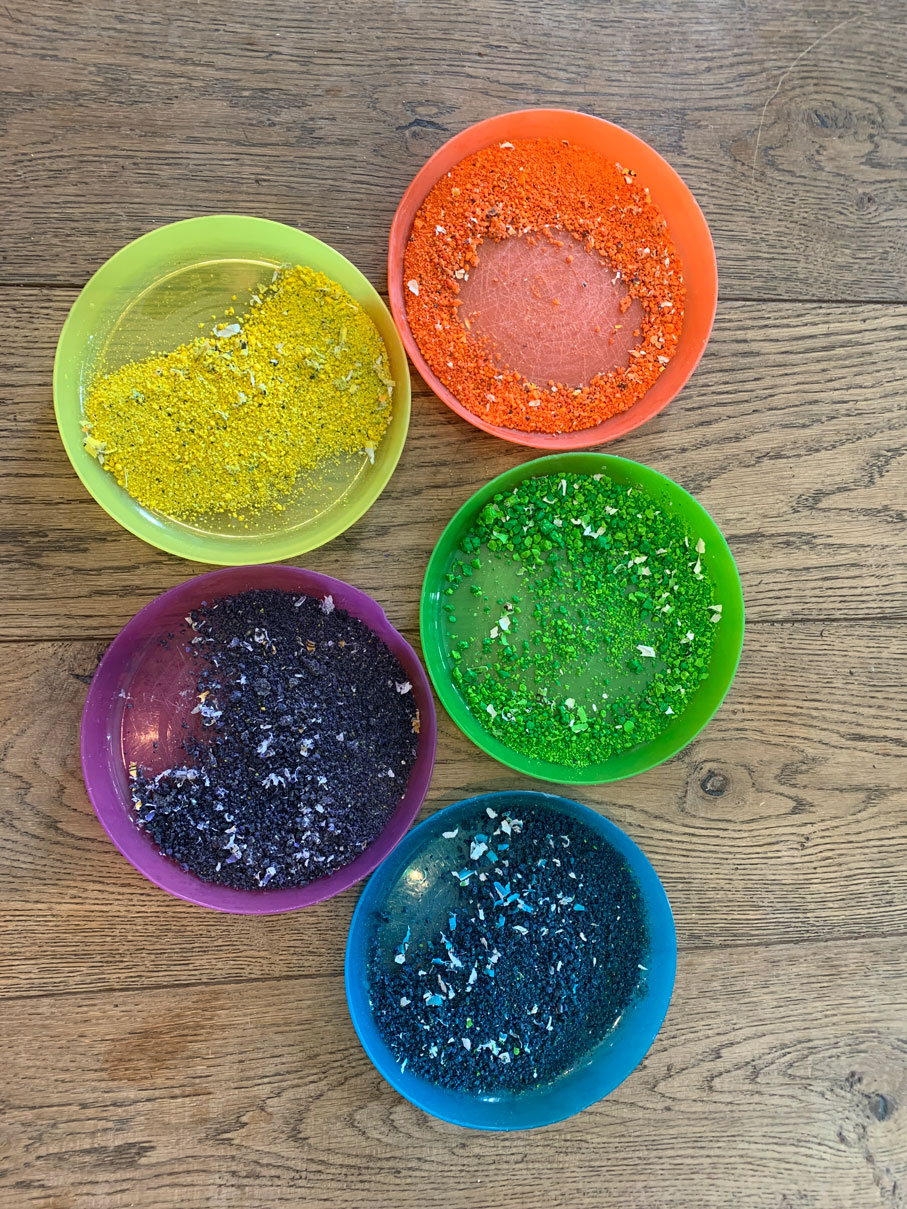
Step #2 – Give each child piece of tin foil and crayon shavings.
I put a spoonful of each color onto each child’s piece of tinfoil. They can chose to mix the colors up or keep them in layers.
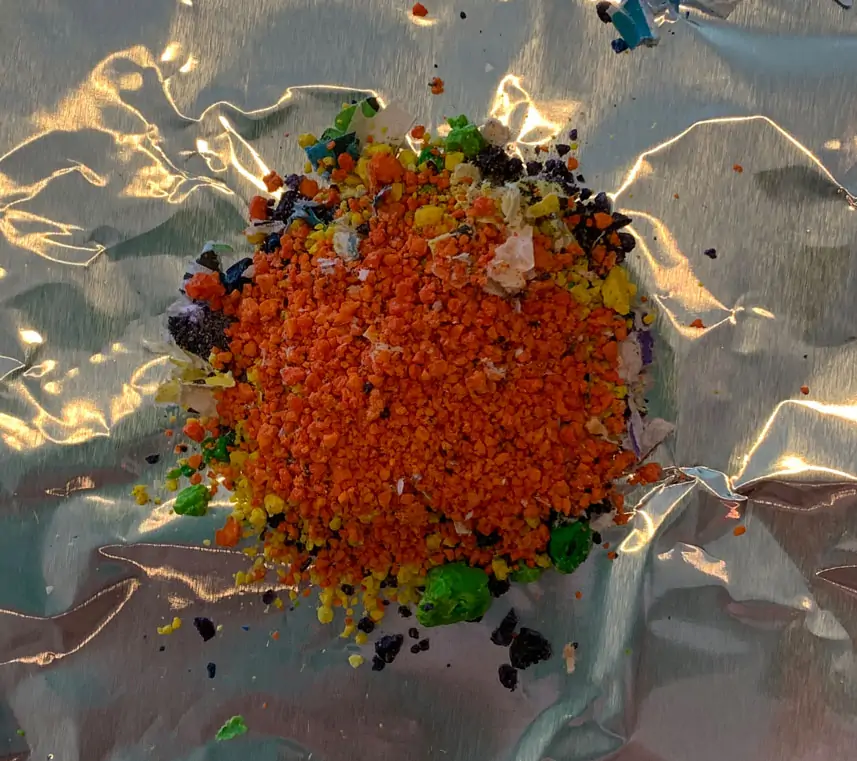
Step #3 – Make a sedimentary rock
Explain how a sedimentary rock is formed. For a sedimentary rock you need sediment which is small pieces of other types of rocks like sand and dust. These sediments are formed in layers and cemented together You can also make sedimentary rocks with bigger rocks as well which would make a conglomerate rock.
We visited Fantasy Canyon and this post share with you how they amazing looking rocks were formed. They are all sedimentary rocks that your kids would love to see.
These crayon shavings represent sediment that has been weathered off over a long time. As you give a spoonful of each color you can explain how each color is its own type of rock that creates a layer. Over time you get multiple layers creating a rock.
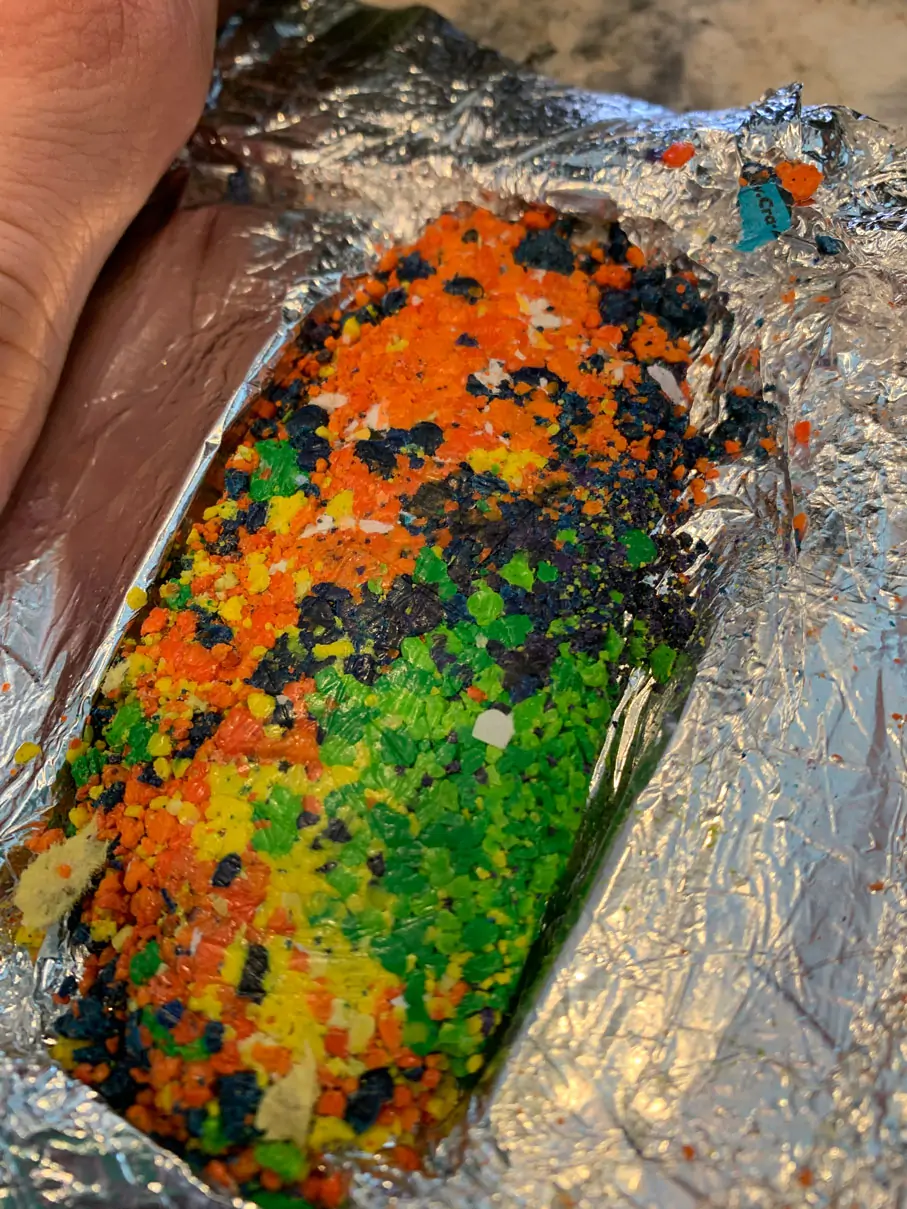
Once you have all of the colors on the tinfoil, have them fold the tinfoil in half and have them push on the shavings. After they have pushed on it, have them open the tinfoil up to check out their sedimentary rock. It won’t stay together if they pick it up, but you can see the sediment as begun to mold together.
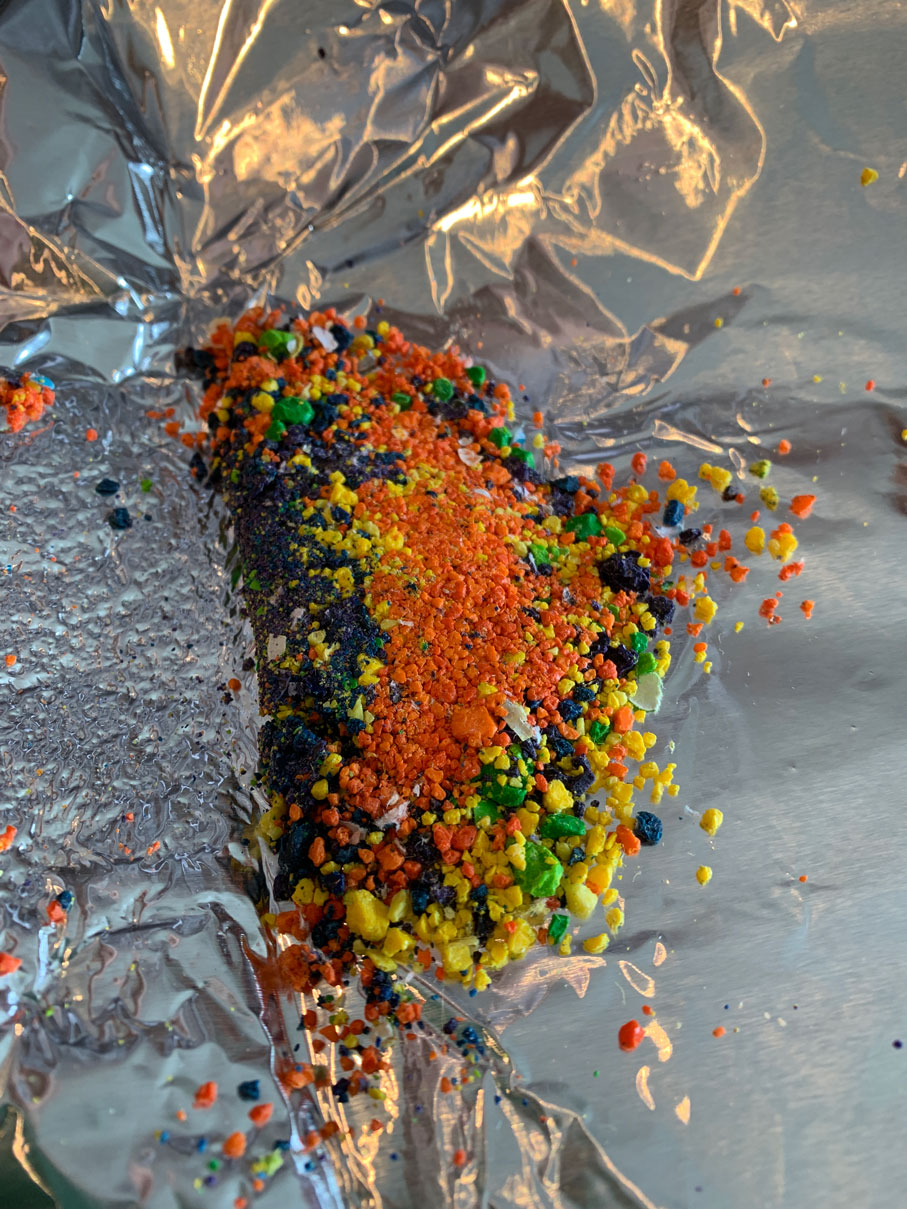
Step #4 – Make a metamorphic rock
The next step is to make a metamorphic rock. Have your kids fold up their tinfoil so the crayon shavings are in a rectangle shape. We found by making it into a smaller shape, it will compact better. Now using pressure and the heat of your hands, compress the shavings even harder.
Metamorphic rock changes with heat and pressure. A sedimentary rock will change to different metamorphic rocks as more pressure and heat is added. You could get a blow dryer as well to help add more heat.
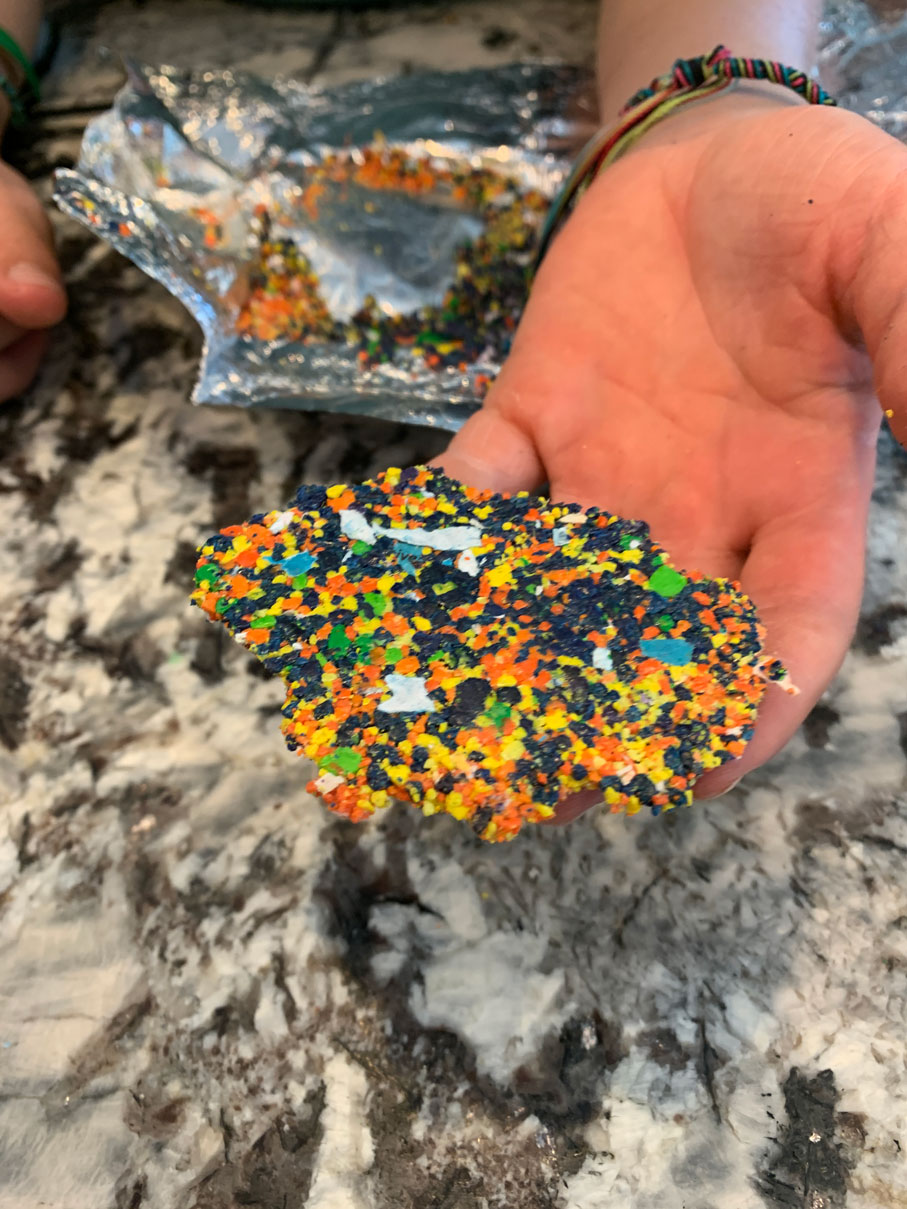
Once they are done, have them open up their tinfoil to check out their metamorphic rock they have created.
You should be able to pick it up with your hands without the crayon falling apart. They are still very fragile but the kids loved this step. They thought the designs were really cool in their “rocks”.
Step #5 – Make an igneous rock
The last of the 3 rock types to make is the igneous rock. Igneous rock is formed by rock melting into magma and cooling to make a rock. If it cools faster in is an extrinsic igneous rock and will be more porous. If it cools slowly, it is more of an intrinsic rock and will be more compact. Rock with crystals showing are igneous rock.
Rocks that come out of a volcano turn into igneous rocks. Here is a perfect outdoor volcano making kit! Super fun activity you can make in snow, dirt, sand etc. This children’s book of a legend about two volcanos in Mexico is beautiful.
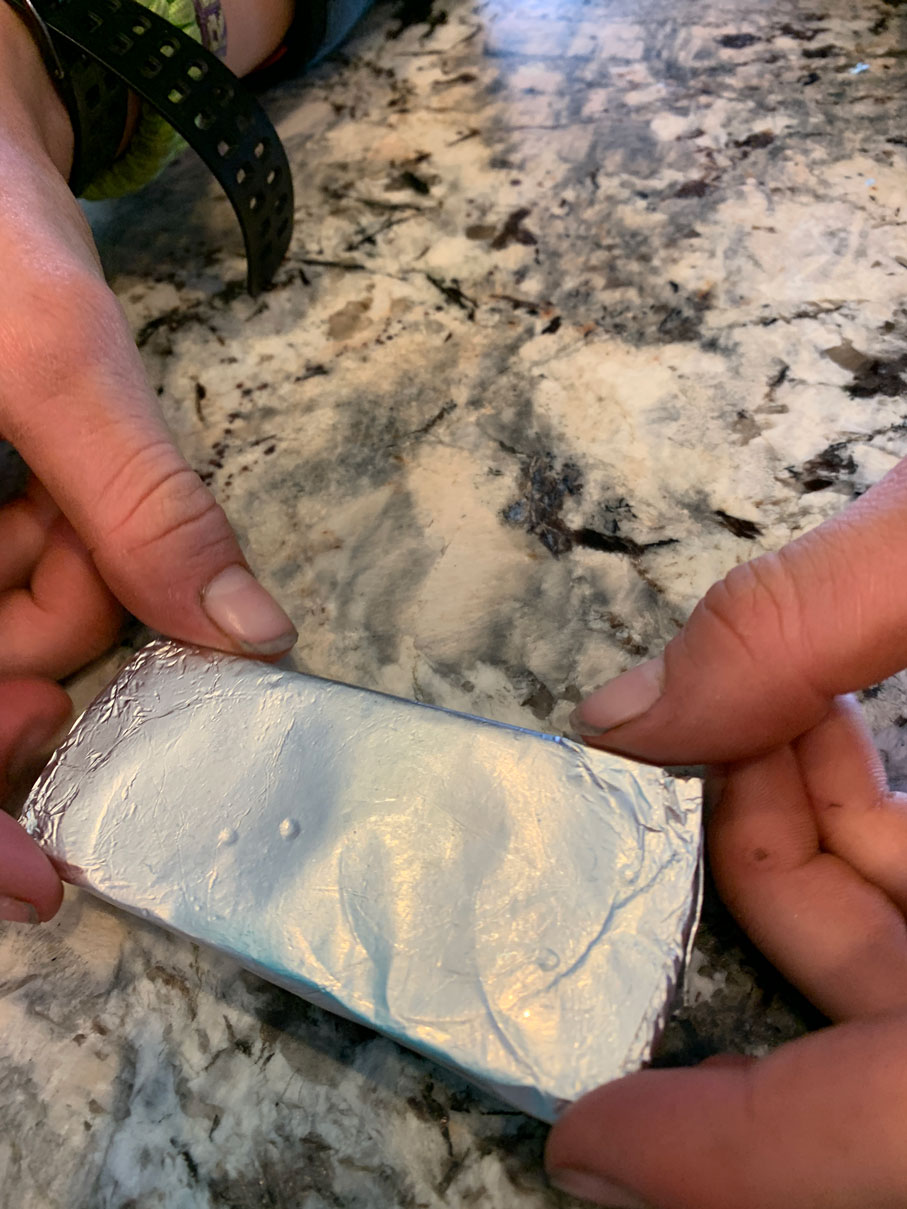
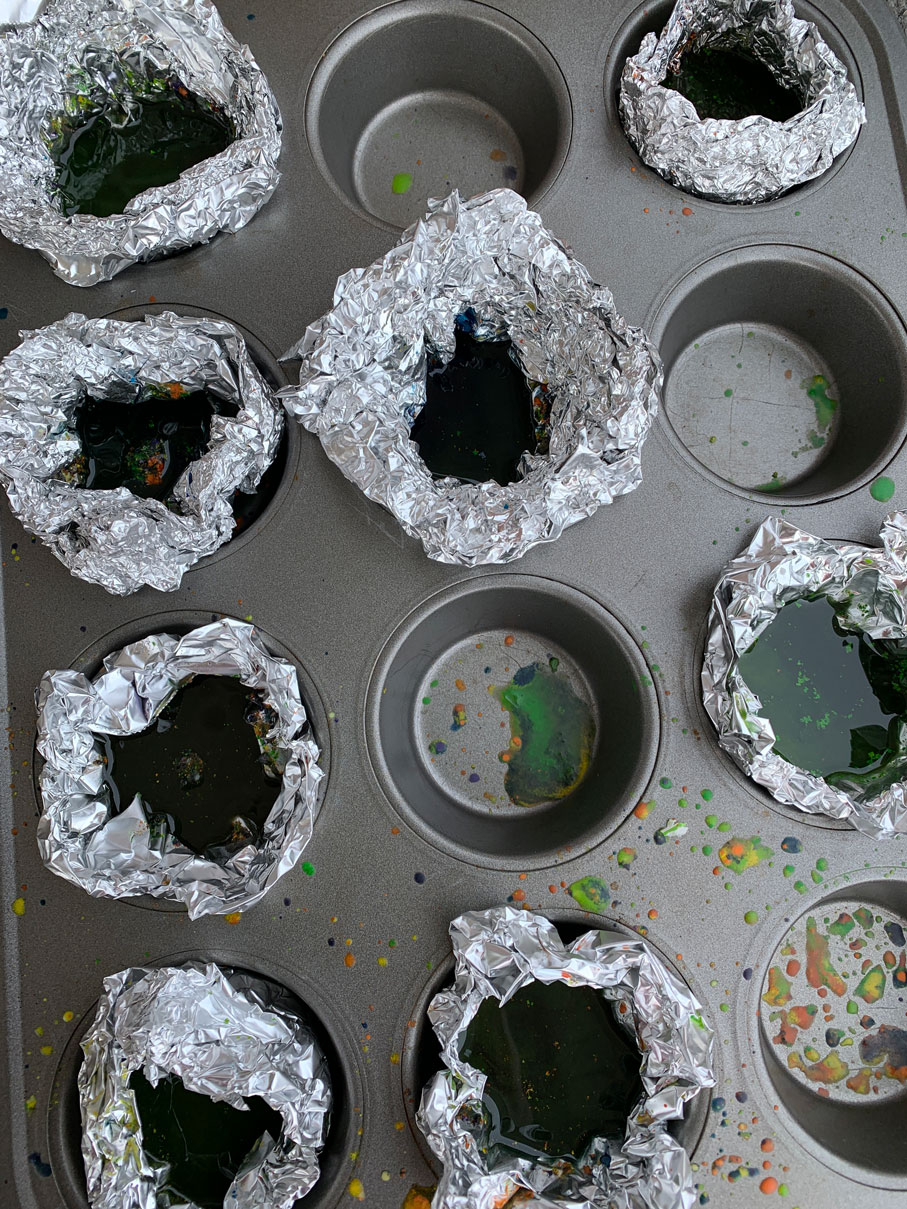
Get our your cupcake pan and add the tinfoil cupcake liners or tinfoil liners for each child. Have them break their metamorphic rock and place the shavings in their cupcake holder.
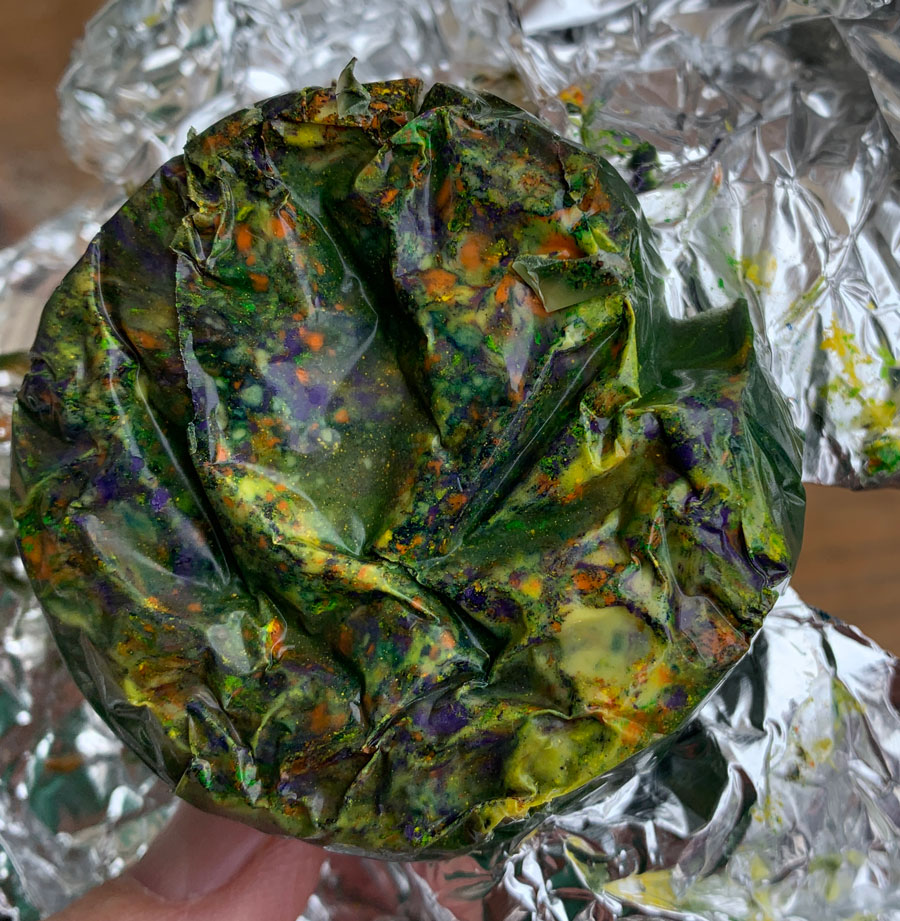
Place the cupcake pan in the oven on low heat and allow to melt. You can decide how much to melt the crayons. We melted the shavings all of the way and they mixed in color. Once melted, pull them out of the oven and allow to cool
As we pulled them out there were really cool designs on the bottom of each one.
Step #6 – Have them color with their newly created “rock”
This is fun because there are different shades of color all through your new crayon. Especially if you don’t melt the crayon all of the way to where the colors completely mix.
I hope your kids have fun with this activity! We sure did. Here is a fun scavenger hunt we did with rocks!! We loved doing it. Here is a book of Stories of Rocks from The Well Educated Heart. Another fun children’s book is called If Rocks Could Sing. It is a ABC rock book which is a fun book to get your kids searching and paying attention to rocks as they are outside. You could start your own rock alphabet.
One Response