Hands on learning is such a powerful part of a child’s education. It creates connections far greater than any worksheet or picture could ever do. I am always looking for different ways to incorporate a hands on project to teach a concept or help implant a memory within our hearts. This topographical salt dough map idea is so perfect for this!

This activity is something your kids can do while you read to them with endless creative. You can create countries, cities, mountains, scenes from a book etc. It is cheap, easy, and fun! It creates something that is touchable as they mold, paint and label their different creations!
Here is what you need to make your own Topographical Salt Dough Map
- Cardboard
- Marker
- Printout of what shape you are creating: A country, state, county, farm etc
- Flour
- Salt
- Water
- Paints and Brushes
- Toothpicks
- Paper
Step #1 – Make Salt Dough
Salt Dough is really easy!! Here are the instructions:
- 2 cups of flour
- 1 cups of salt
- 1 cup of cold water
Mix the flour and the salt together. Add 1 TBSP of cold water to the mixture as you mix it with your hand. Fully incorporate the water into the flour and salt. Let sit for 20 minutes or so.
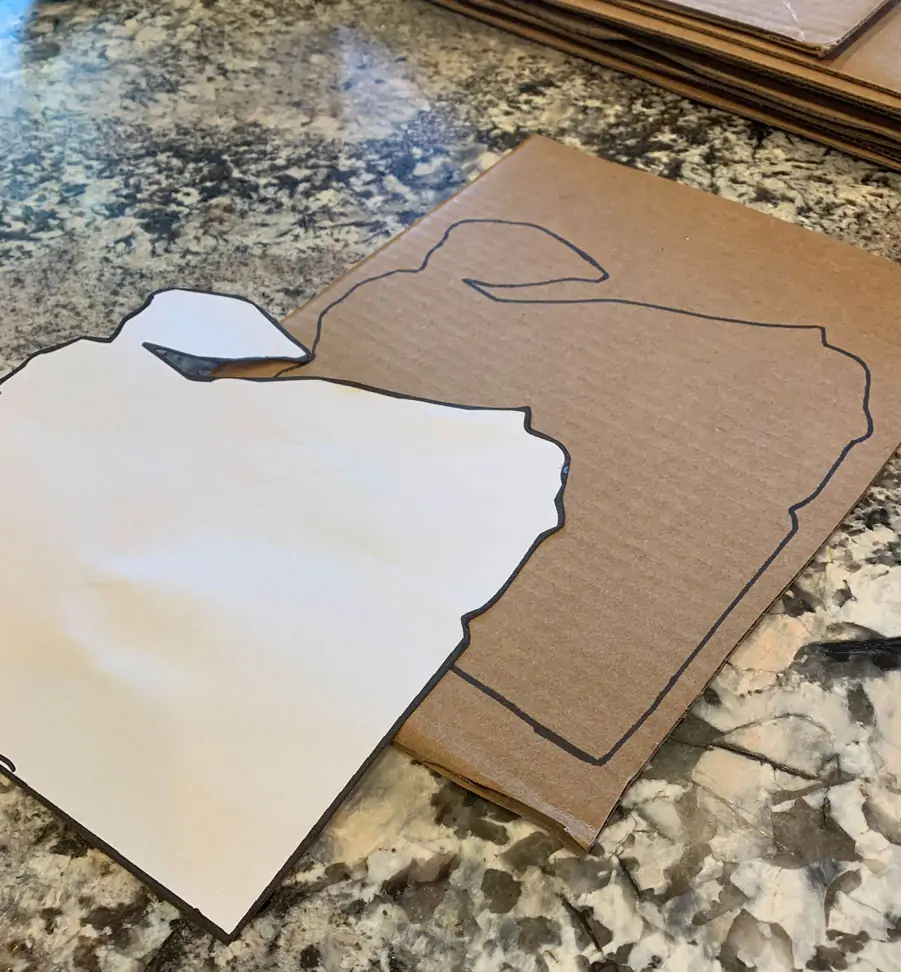
Step #2 – Prepare your cardboard sheet
This month we learned about Egypt so we printing out an outline of Egypt, cut it out and traced it onto a cardboard sheet. We used an Amazon box for our cardboard. Make the cardboard bigger than your outline so it serves as a plate as well making it easier to carry and transfer to different places.
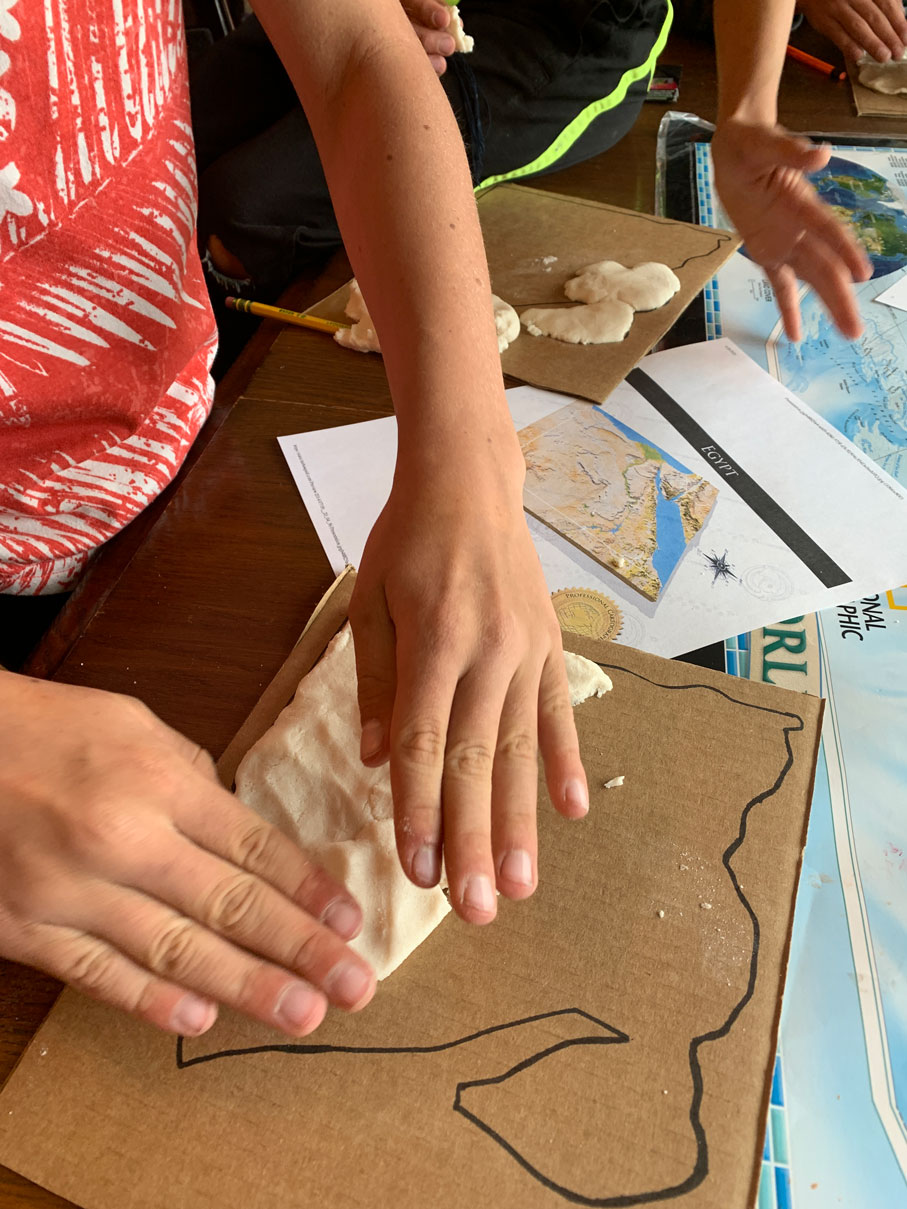
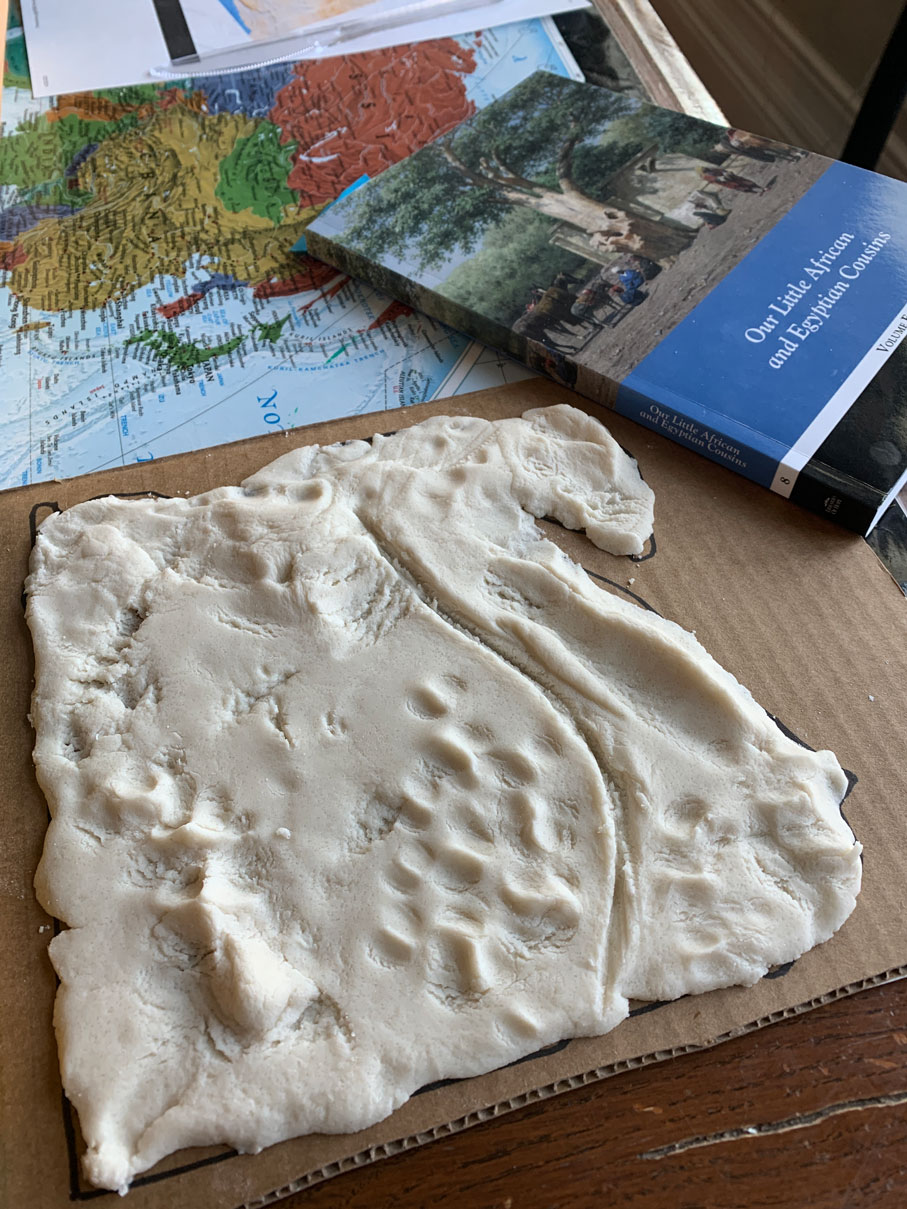
Step #3 – Create your base layer
Grab the dough and start filling in the lines with a thin layer of salt dough. You can create the shapes after you create the base layer. (HINT – don’t make it too thick. Having it too thick will create bubbles while it is being cooked and ruin the terrain you created). My boys used a rolling pin to help with this step.
Step #4 – Create your mountains, streams, rivers, oceans, lakes, etc
This is where it gets fun and where the topographical salt dough map comes in. If you are doing a country, look up online for a topographical map of that country. This will help you see where the mountains are along with all bodies of water. Don’t be too technical. Being too technical will take the fun out of it.

Step #5 – Cook your creation
Place your creations on cookie sheets and cook them at 275 degrees for 2 hours. Allow them to fully cool before moving on to the next step. We made this a 3 day project. One day we created and cooked them, the next day we painted them, and the last day we labeled major landmarks. For example, in Egypt we labeled where the Great Pyramids are.
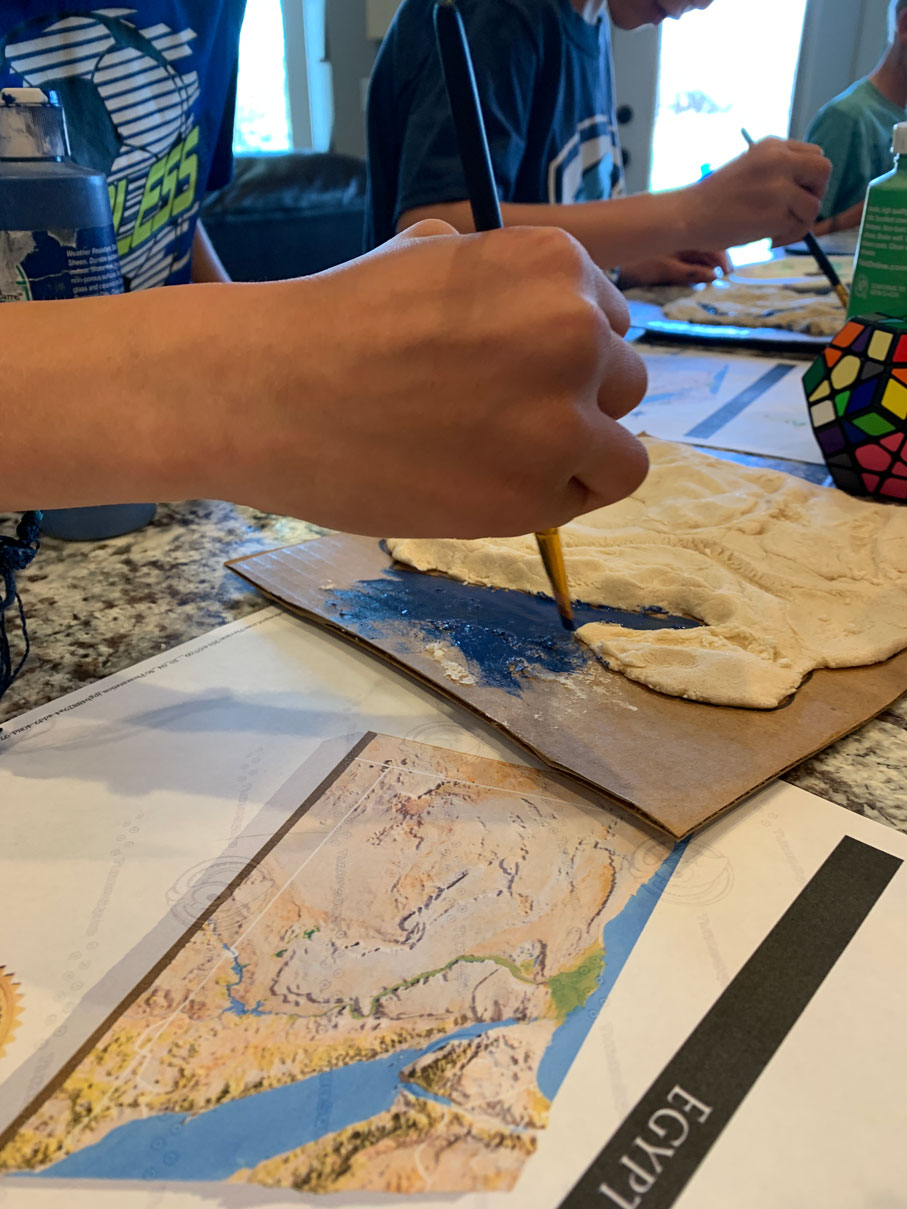
Step #6 – Time to paint your creation
My boys LOVED this part. The topographical map that we found on line we pulled out again and referenced it to find the blue lakes, green hills, or brown mountains. Talk about using many different shades of greens, browns and blues. This will make their topographical salt dough map come to life!
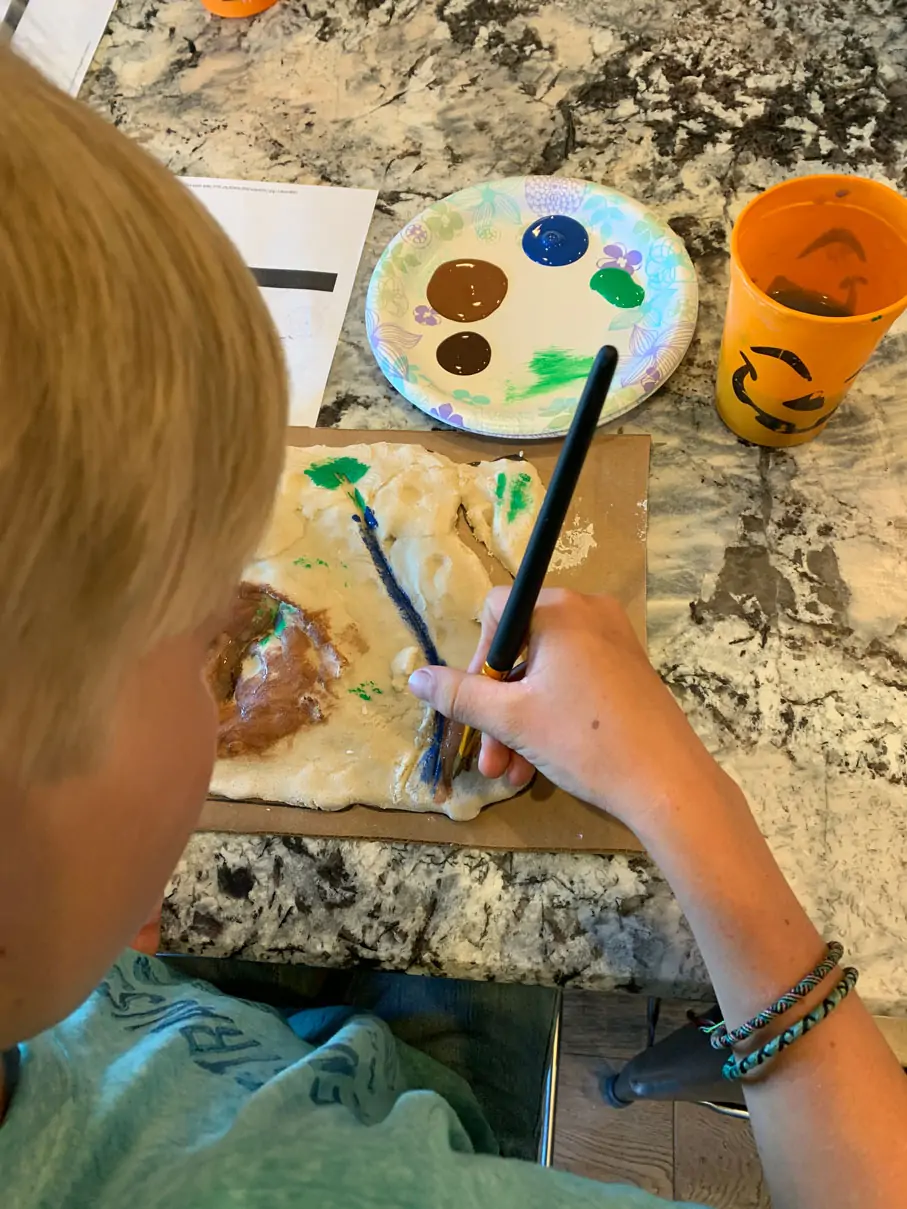
You don’t have to just paint on the salt dough, you can paint the surroundings on the cardboard as well.
Step #7 – Label prominent land marks
You can create trees, homes, animals, or simply just toothpicks with a label. The sky is the limit.
This is a project that we will do over and over. My boys know Egypt now, where it is located, and prominent landmarks within Egypt. I read to them a story from Our Little Egyptian Cousins from this book! It was so fun to follow where the characters traveled in Egypt throughout the story.
Homeschooling can feel overwhelming, and it’s easy to doubt yourself along the way. I help moms turn that stress into confidence, calm, and joy — and my coaching program includes access to a free workshop that walks you through the first steps. Learn more and save your spot →