This last week my boys and I learned a little bit about Africa and we came across these African magazine beads that looked awesome! The best part about these beads, is that you will probably have everything you need to make them. We decided to test them out and we loved it! My five year old could even make them.

Before we make creations like this, I love to read this book called ISH by Peter Reynolds. This is a fantastic book to help build confidence in your kids creations that look ishish.
When my kids made these at first they were all thumbs. After a few though, they were pros and making a ton. It is a great activity to do while you are reading aloud to your kids.
Here is what you need to make these awesome African Magazine Beads
- Magazines
- Skewer stick, straw, chopstick (basically a stick that is as big around as you want your bead hole to be). I used a skewer stick
- Scissors
- Glue (I used Glossy Mod Podge which worked great)
- African Animal Outlines if you want (example below).
- String of some kind to make necklaces or bracelets if wanted (example below).
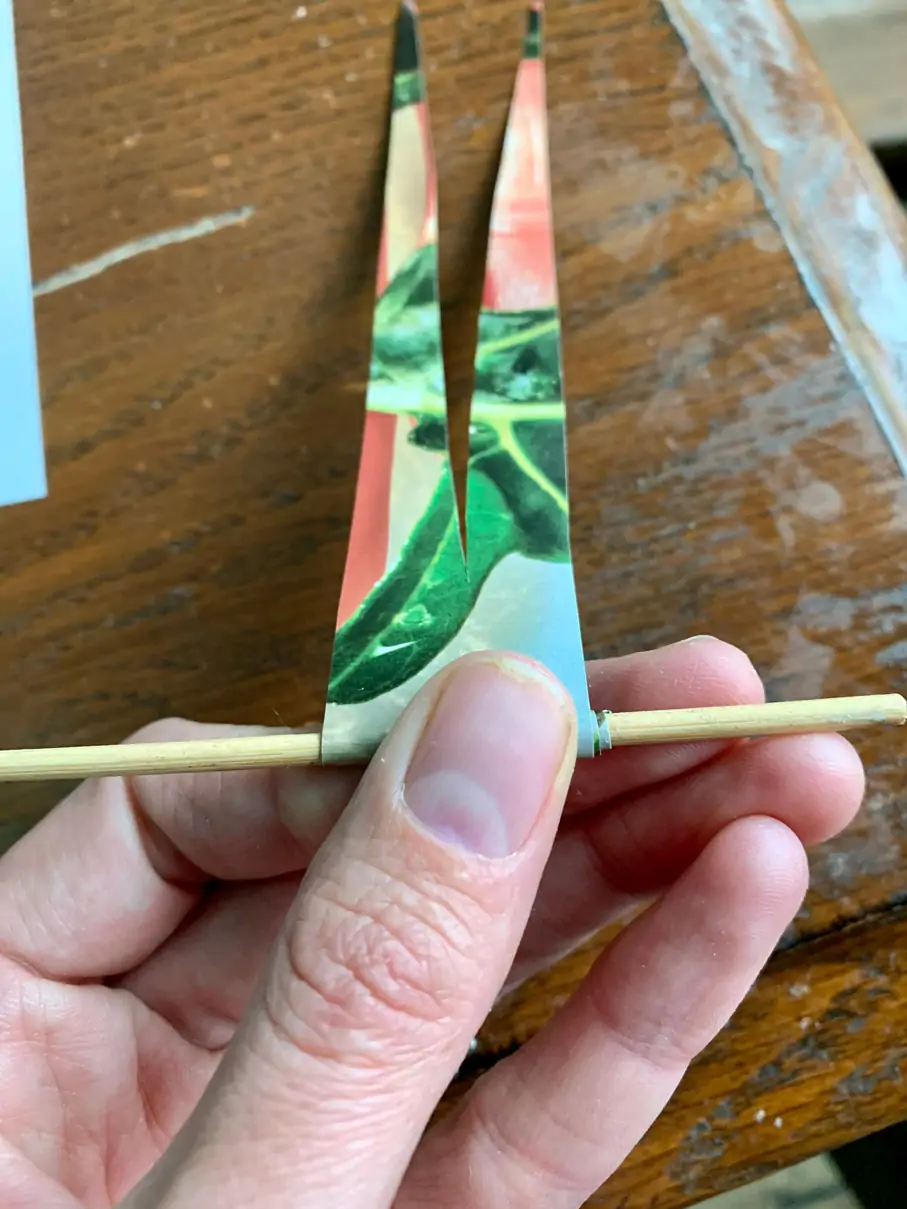
Step #1 – Cut out your magazines the shape you would like your bead.
Here are a bunch of examples we used. However, these are just a few you could use. Have your kids use their imagination! There are so many options to make some cool looking beads.

Step #2 – Roll the paper you just cut out onto a skewer stick, or any other small stick
I also found the nifty hand machine that rolls them up for you! If your kids really have a lot of fun doing this activity, it might be fun to get this hand machine to make them faster.
Step #3 – Get some Mod Podge on your thumb and finger and glue the end down
I like to put Mod Podge all over the bead and twist it around. It will dry clear and it makes the bead a little more durable.
Step #4 – Take the bead off of the skewer and let dry
Repeat steps 1-4 until you have as many beads as you want. Once you have them done, the sky is the limit of what you could use them for. You can make bracelets, necklaces or even earrings. My boys made some bracelets which were pretty cool.

I also created outlines of African animals so they could glue the beads and create the shape of an animal. These turned out really cool! You could frame them and put them on your wall. They would be super cute in your kids rooms. Here are a couple examples.
My son loved making his giraffe.

This is the free printable of the African Animal Outlines that is available that has a variety of animals on it that should be pretty easy for your younger kids to use. 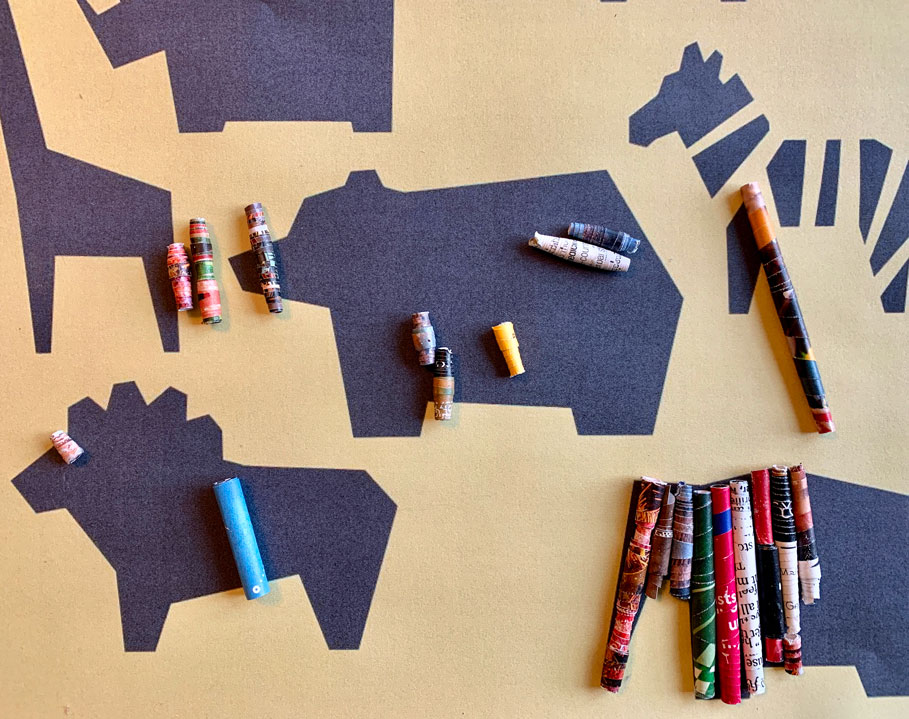
These are just a few things we created. My boys had such a fun time making these that we will for sure doing this again. This is a perfect activity to do while you are reading aloud to your kids.
For another activity on Africa, check out this post on The Boy Who Harnessed The Wind. This book is so full of great activities that you can do with your kids! Our favorite was this homopolar motor that you and your kids can make!
One Response