This elephant toothpaste science experiment is really fun and a great way to teach chemical and physical changes that happens in Chemistry, or it is just a fun experiment your kids can do. I had never seen this experiment before, so I wasn’t sure why it was called elephant toothpaste! After you do the experiment you will understand why it has the name of elephant toothpaste.

If you want more of an educational experiment than keep reading at the end of the post to teach how to observe the physical and chemical changes going on during this experiment. If you are here simply to learn how to do the experiment here it is. Also if you want another project and learning how to make a simple homopolar motor, this post is a mush
Here is what you need to make your own elephant toothpaste science experiment!
(This article contains Amazon affiliate links at no extra charge to you)
- 250 mL graduated cylinder (I have used a beaker too. You can also use a disposable water bottle)
- 50 mL beaker (you can also use a 1/4 cup measuring cup
- 300 mL beaker (a regular cup works too)
- A tray lined with foil
- A kitchen scale- We used this one
- Food coloring – Optional but it definitely adds to experiment
- Hydrogen Peroxide – Get one that is at least 3% strength. I have found the Hydrogen Peroxide is easier to just buy at the store and not on Amazon. If you have access to Volume 20 Salon Developer this works great because it has 6% strength hydrogen Peroxide in it.
- Dish Soap
- Yeast – I used two different kinds and both worked great!
- Warm Water
- Spoon
Elephant Toothpaste Science Experiment Instructions
Step #1 – Place the 250 mL graduated cylinder or empty water bottle on the tray lined with tin foil.
Simple enough right? HA HA
Step #2 – Pour some dish soap in the graduated cylinder or bottle.
Don’t worry about exactness here, 2-4 mL is great.
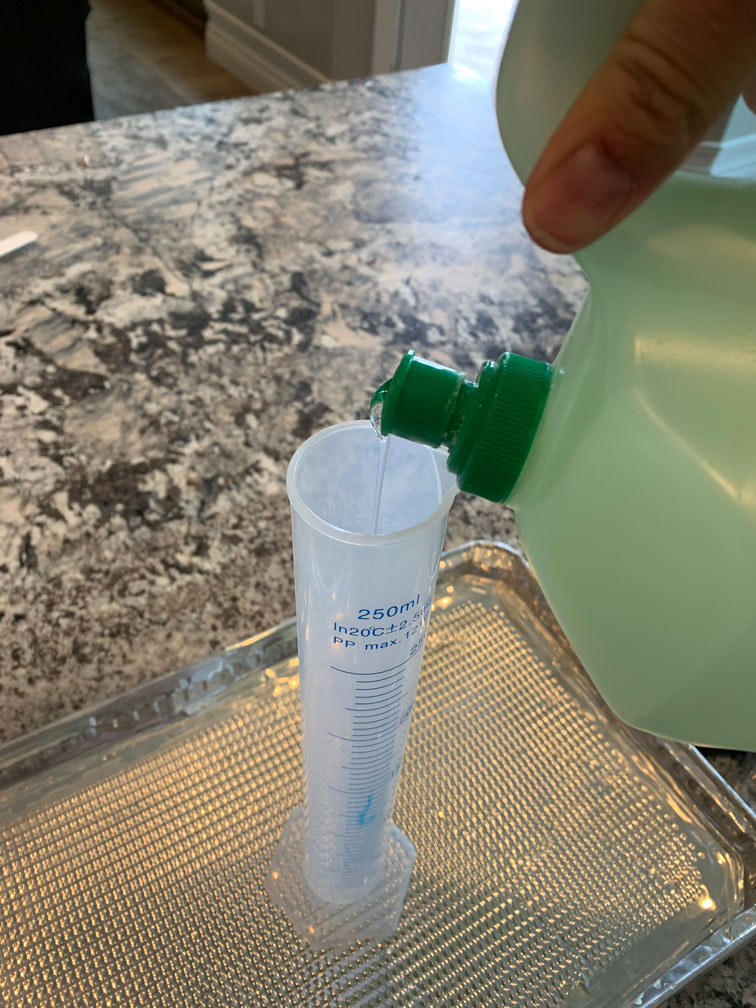
Step #3 – Add any color of food coloring to the soap
We added 10 drops of food coloring. We did it a second time without cleaning up the mess on the trey and used a different color. It was fun to watch the designs on the trey with the two colors.
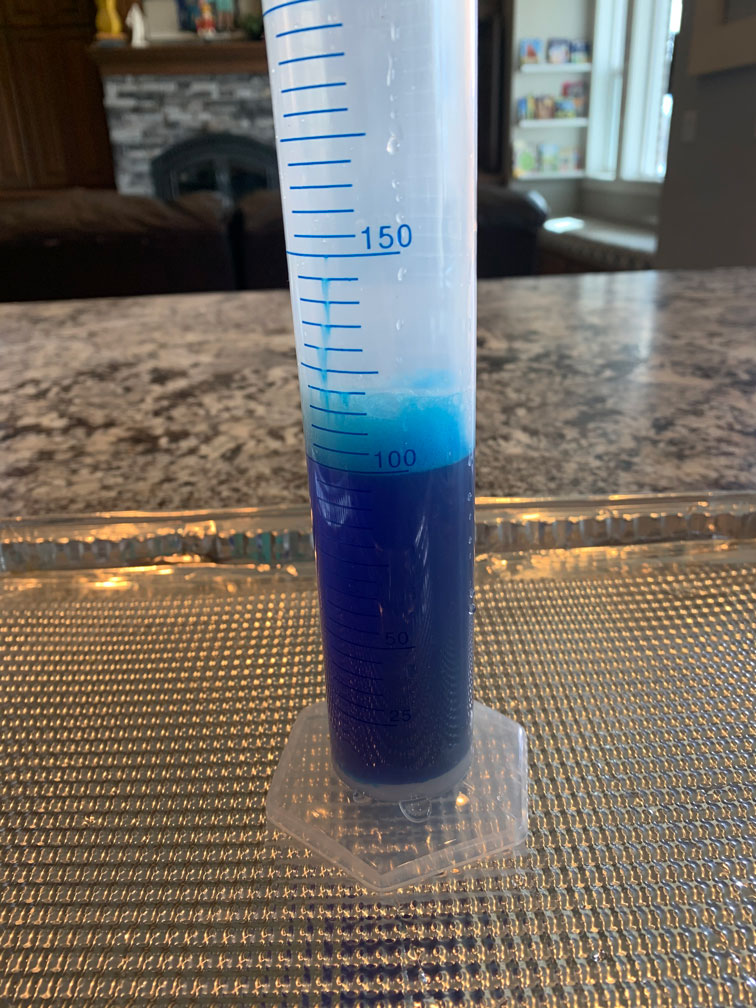
Step #4 – Fill the 250 mL graduated cylinder with hydrogen peroxide to the 100 mL mark.
If you are using a water bottle, just add 1/2 cup of hydrogen peroxide to the bottle. You can use a funnel if you need to. There may be some bubbles that form.
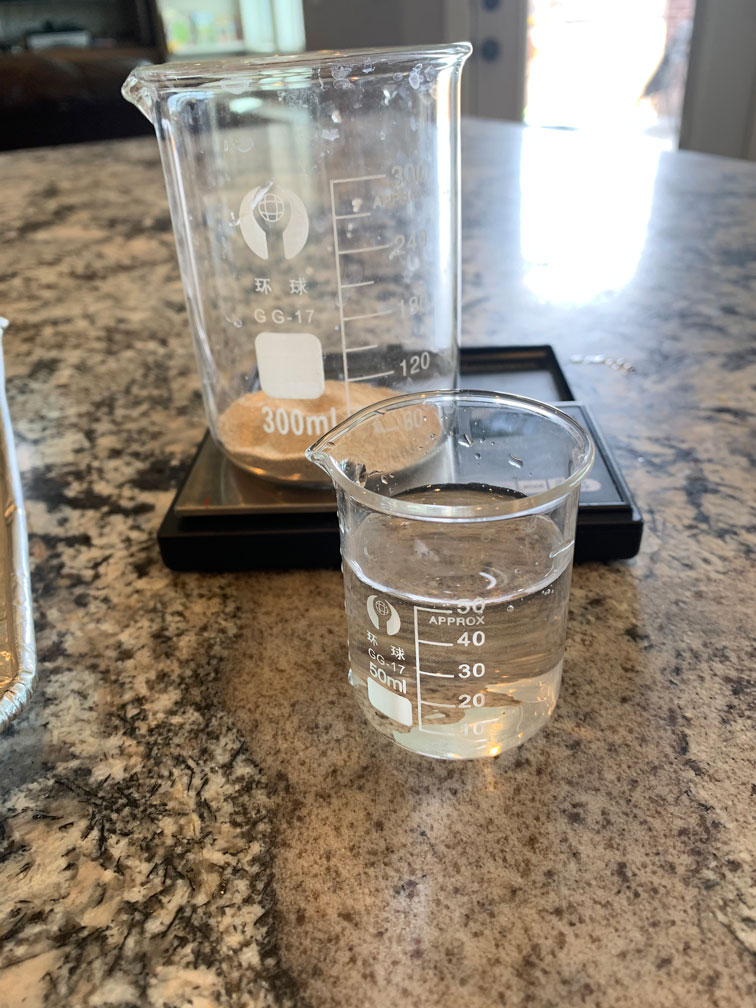
Step #5 – Place the empty 300 mL beaker on your kitchen scale and zero it out to 0 grams.
You will be weighing yeast in this beaker, so make sure that the scale says 0 even with the beaker or cup is on the scale.
![]()
Step #6 – Weigh 10 g of yeast into the beaker.

Step #7 – Measure 50 mL of warm water in the the 50 mL graduated cylinder
Pour the warm water into the yeast and stir it up. If you don’t have a graduated cylinder than just add 1/4 cup of warm water.
Now is the fun part to pay close attention to.
Step #8 – Pour the yeast/water mixture into the graduated cylinder or water bottle and watch.
This is so fun and is definitely a crowd pleaser!
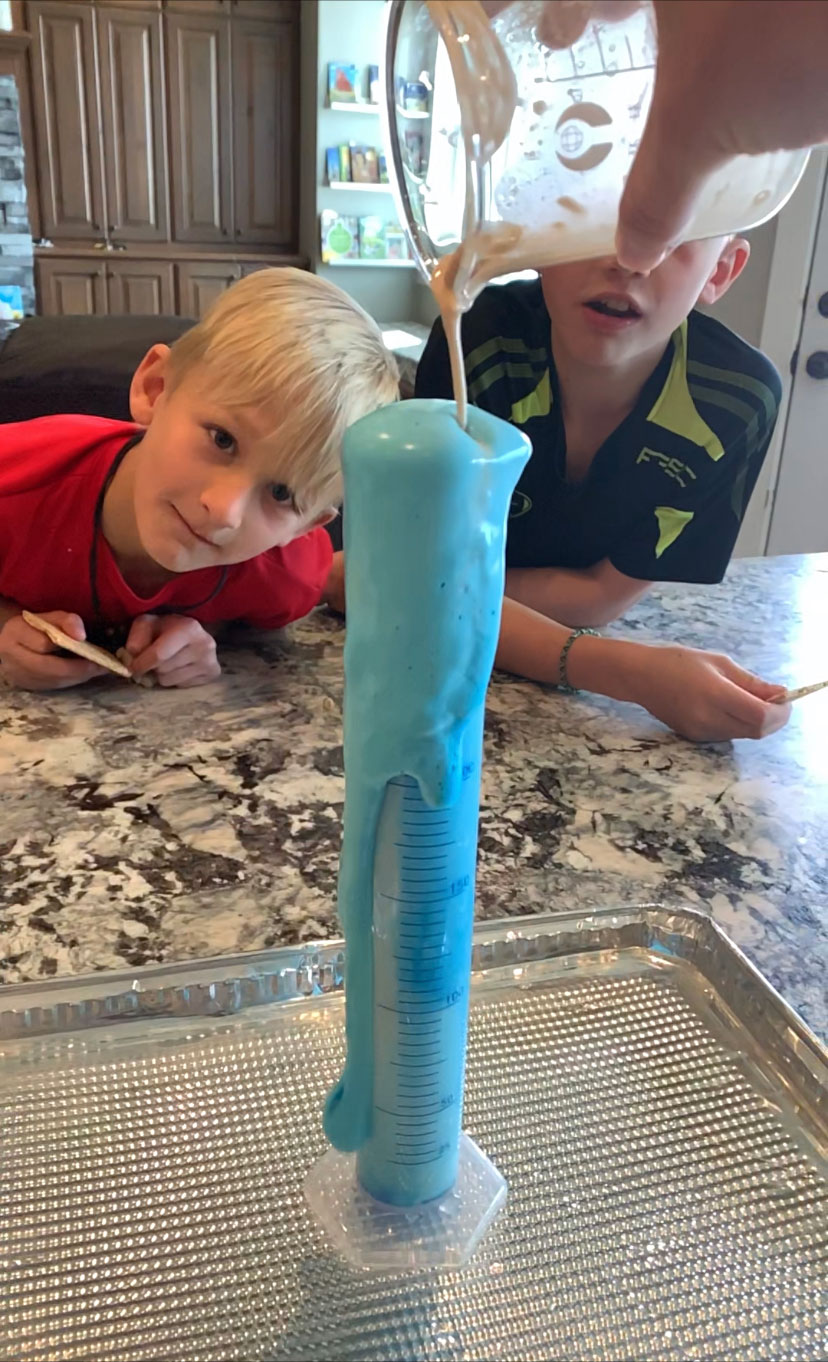
Warning: if you put in food coloring, touching the elephant toothpaste will stain your hands. Don’t worry though. It will go away in a day or two. Don’t hesitate to let your kids touch and feel.

Learning the difference between chemical and physical change
Telling the difference between a chemical change to a physical change can be kind of tricky. Here are some tricks and hints. Physical changes do not change the chemical composition of something whereas chemical changes form new substances. For example water. When you freeze water, water is still water and it still contains H2O. Even though it changes form, it doesn’t change chemically.
Physical changes are reversible (think water- ice, water, steam)
Chemical changes are irreversible (think burning wood, or cooking an egg)
Here are some hint to let you know if there is a chemical change going on
- Do you hear a sound?
- Do you see bubbles? This may not always be an indicator since boiling water doesn’t change to composition of water
- Do you smell anything new? We smelled the yeast stronger after we mixed it with water, but the yeast smell was there before just not as strong so that isn’t a chemical change. However, when food or animals decompose outside, you smell a definite decomposing smell. This is a great example of a chemical change as food is decomposed and changed into nutrients to make great dirt.
- Do you feel a change in temperature or see a light? Feel the elephant toothpaste after to do the experiment and see if you notice any difference.
- Do you see a change in color? The food coloring doesn’t count in this, but a banana getting ripe and turning brown is a great example of chemical change. Copper turning green over time when reacting with water and oxygen is another example of a color change from a chemical reaction.
- Does a solid form? Think of an egg. It is liquid at first and then when it is cooked it becomes a solid. The compounds in an egg are broken up and reformed into a solid when cooked.
If you google videos on physical and chemical changes there are great ones out there. We checked this one out.
Have you ever wondered how much salt there needs to be to make something float? Check this post out!
