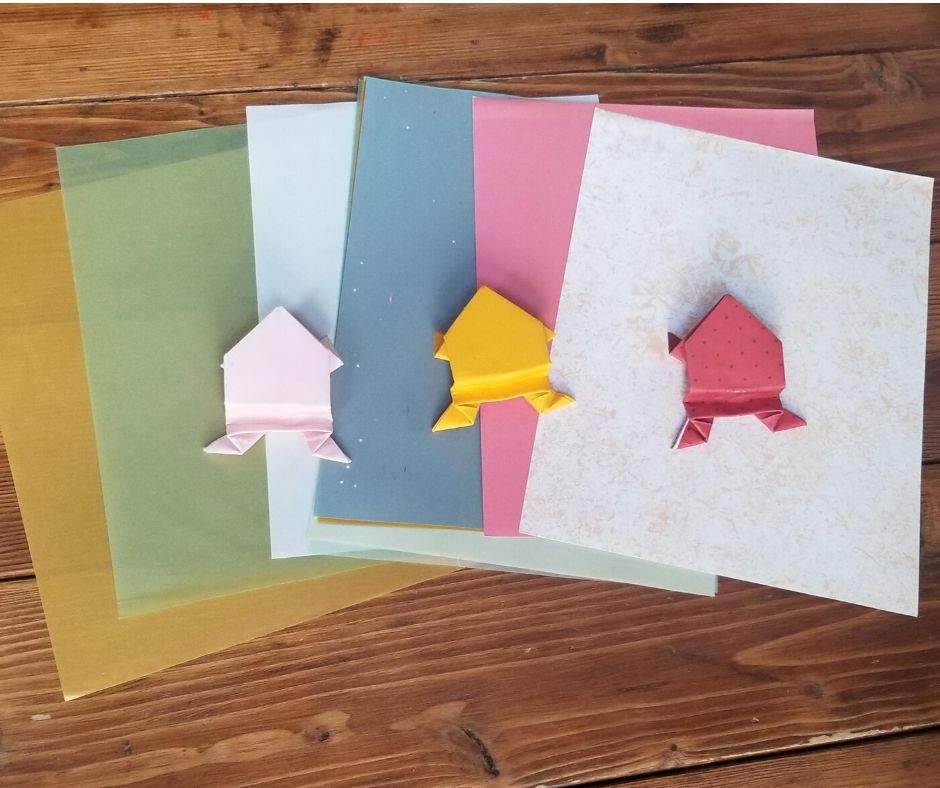
Origami jumping frogs is a perfect activity that you can do with your kids as you learn about frogs or Japan culture. It is also just a fun activity to do! September is the month we study Japan for world history with the Libraries of Hope rotation. Whenever possible, I like to choose an activity that all my kids (ages 14 down to 3) can participate in together. We decided to make these awesome origami jumping frogs!

The great thing about this activity is you only need some paper and a little patience to get started (no long list of supplies). Origami paper is nice, but you can use scrap-booking paper or regular printer paper if you cut it into a square first. The little ones required lots of hands on help, but everyone had fun. I call that a success!
If you have lots of littles and want to be extra prepared, I recommend practicing a couple of frogs by yourself to get the hang of it. It’s helpful to make sure all your folds are pressed down to form clean, crisp edges. There are a lot of steps, but it only took me about 20 minutes to help all five kids through the process. The frogs were great fun to play with afterward and performed some impressive jumps and flips.
Fun Facts:
- Origami is the Japanese word for the art of paper folding.
- Frogs are symbols of good luck in Japanese culture.
Instructions to make your own origami jumping frogs
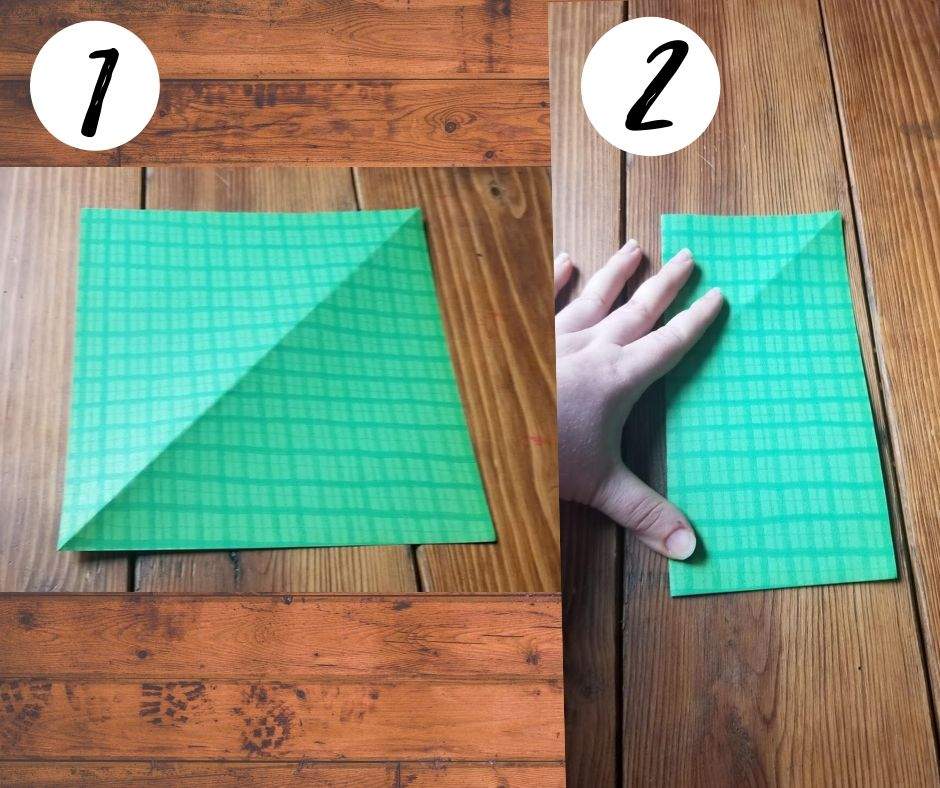
STEPS 1-2:
First, if you don’t have origami paper, make sure your paper is a square. You can see where I folded mine to make a guideline before cutting the paper. Next, fold the paper in half.
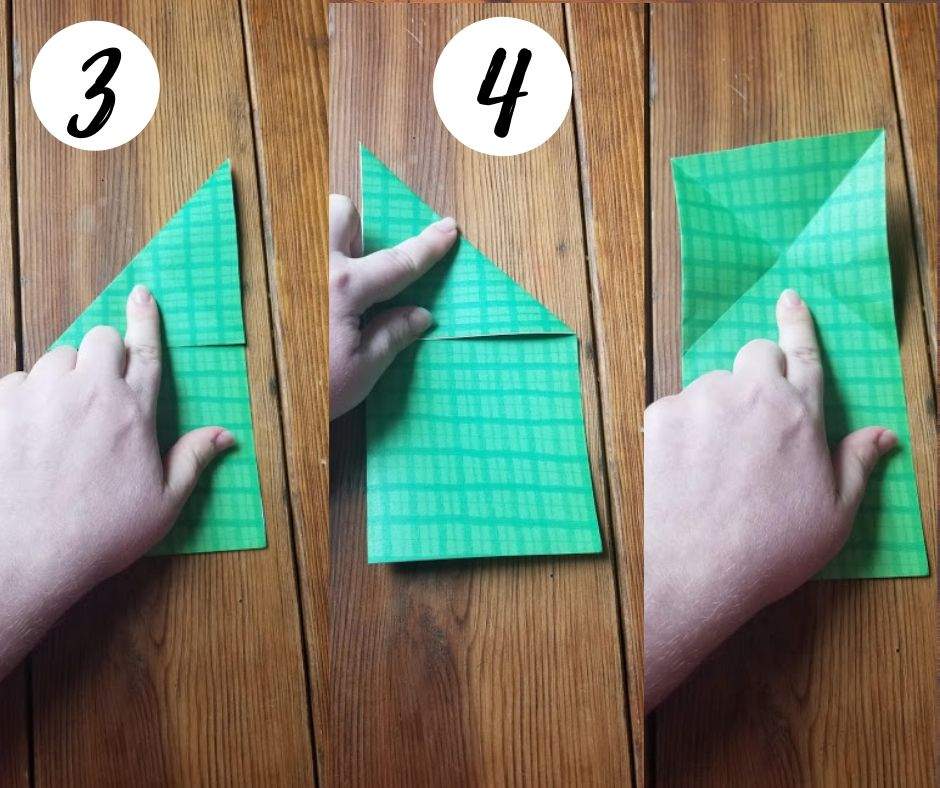
STEPS 3-4:
Now fold and unfold each of the top corners over to make an X in the top half of your folded paper.
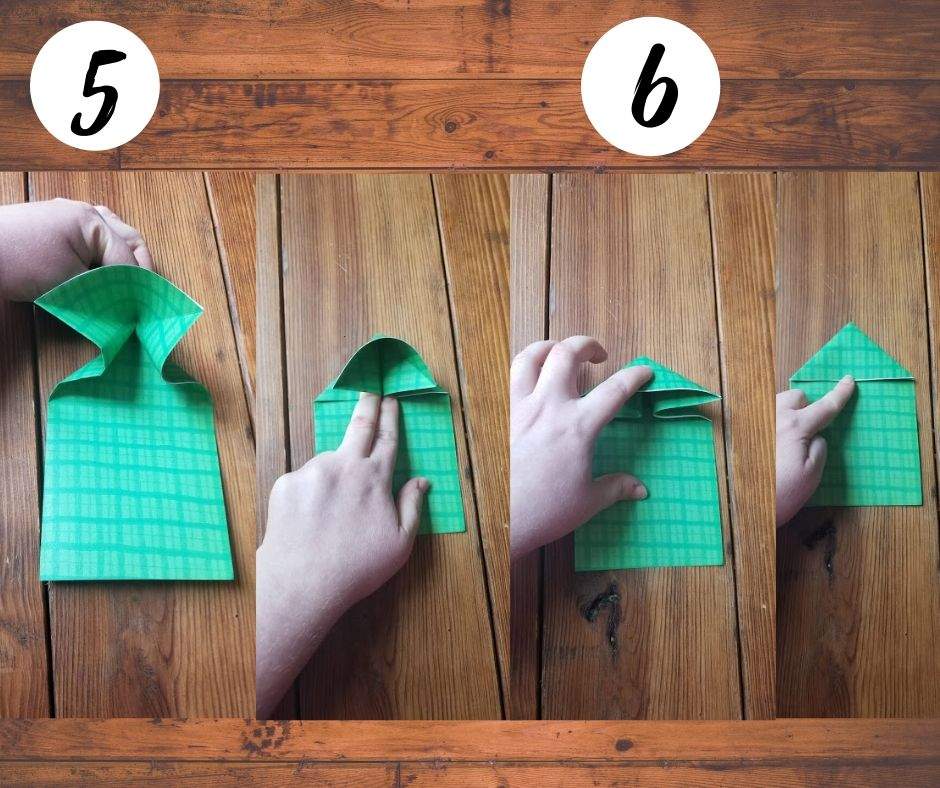
STEPS 5-6:
This part is a little tricky. Pinch the back of the X you made in the last step. Then bring the outside edges of the X square together to begin forming a triangle, first on the bottom and then the top. Press the top down to form the complete triangle. Now you should have something that looks like a little house. The triangle is your frog’s head!
STEPS 7-8:
Now we’re going to make the front legs of your frog. Fold up the bottom corners of your triangle to make the legs. You want the feet to stick out over the front so you can see them when you flip the frog over. Make sure you try to match the angle on each side so your legs are even.
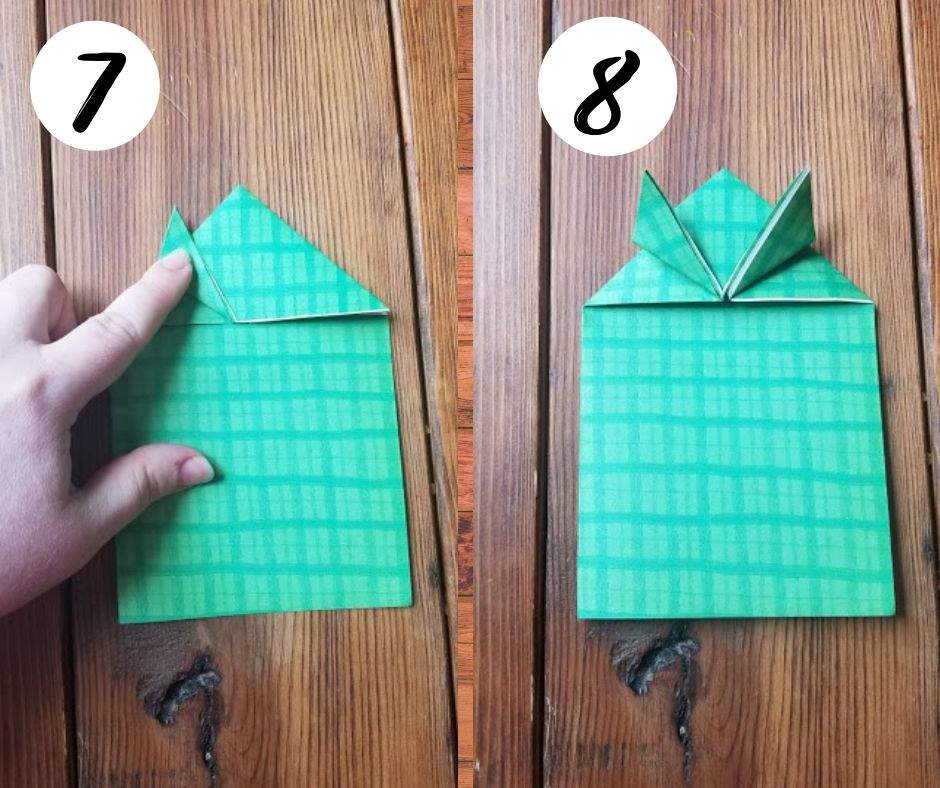
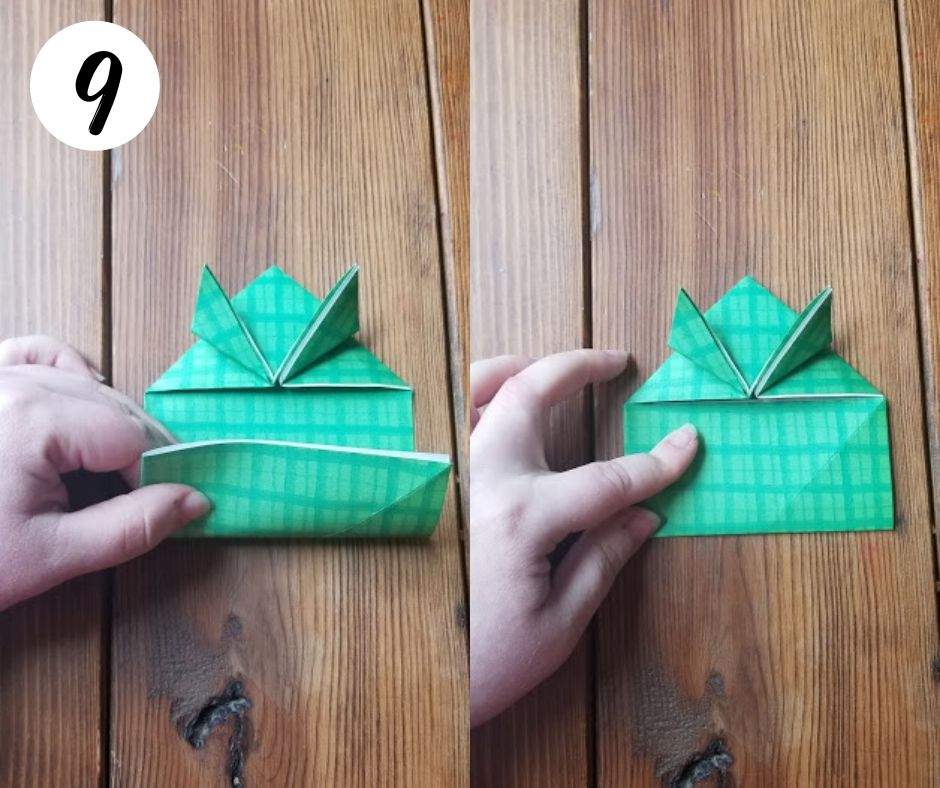
STEP 9:
Now fold the bottom of your paper up to the bottom of the triangle at the top. Remember to make sure the folds have strong creases.
STEPS 10-11:
Turn the paper to the side and lift the triangle flap to make room for the next fold. Fold the outside edge of the paper into the middle. Do the same for the other side.
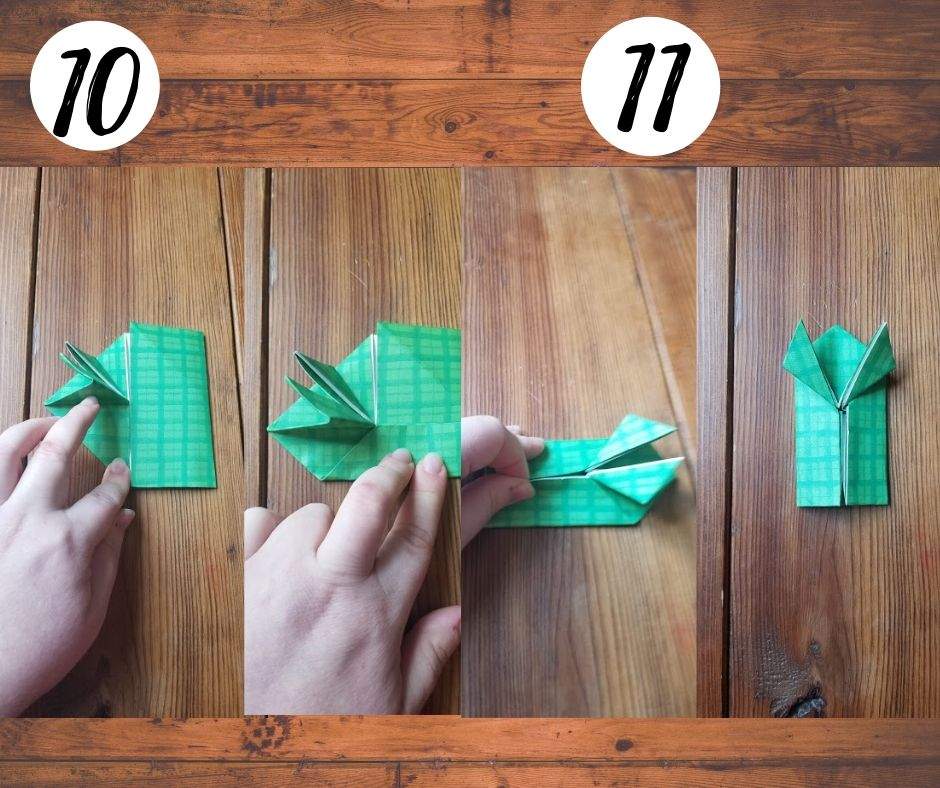
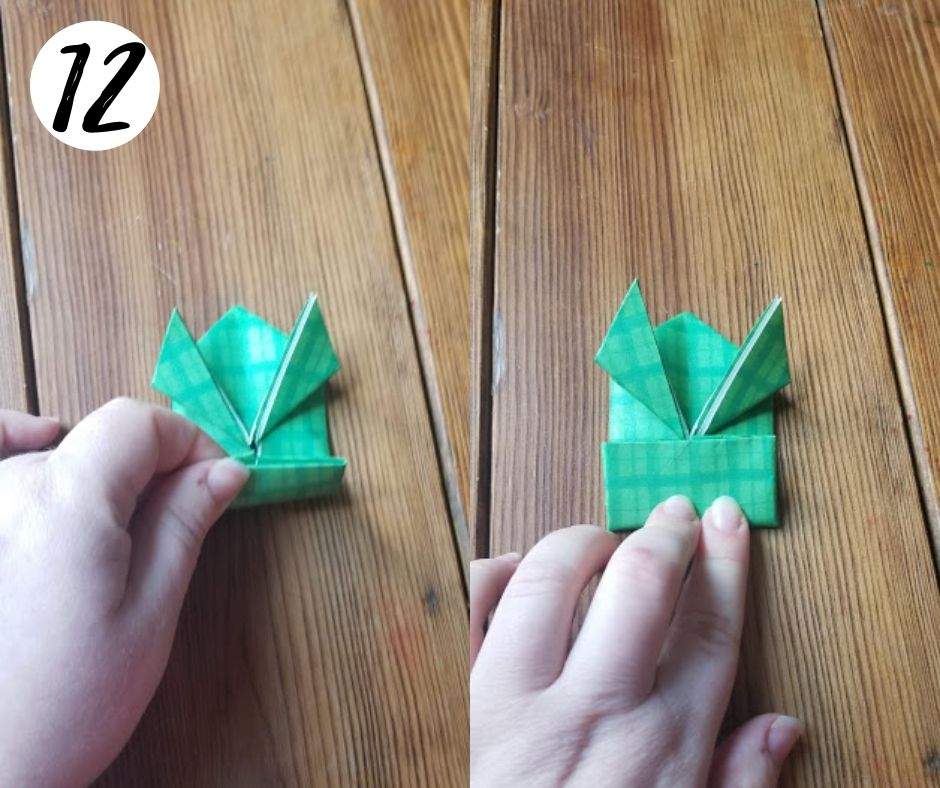
STEP 12:
Fold up the bottom of your paper and match it up to the point where your front legs begin. The last few steps will get a little tougher to fold as the layers of paper get thicker.
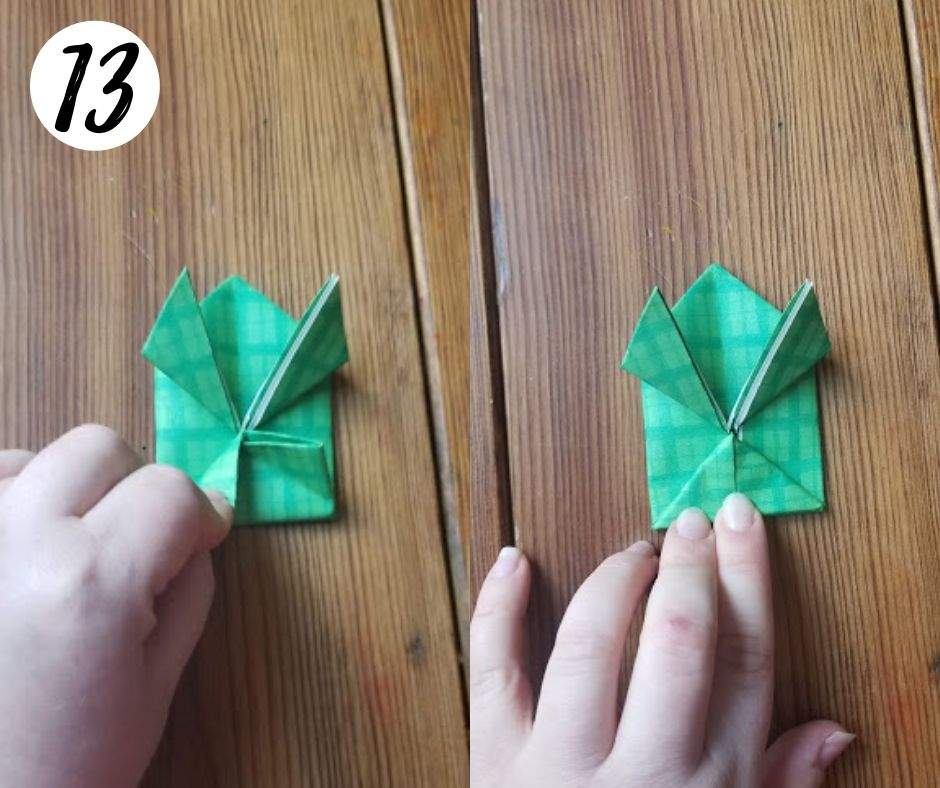
STEP 13:
Fold the corners of your bottom rectangle down to meet in the middle. It’s kind of like you’re making a paper airplane.
STEPS 14-15:
Here’s another tricky part. Point the bottom triangle up to the ceiling. You’ll notice it separates a little and you can see two separate points. Pull the points away from each other to separate the triangle and flatten it out. Fold the shape down so it looks like a little boat.
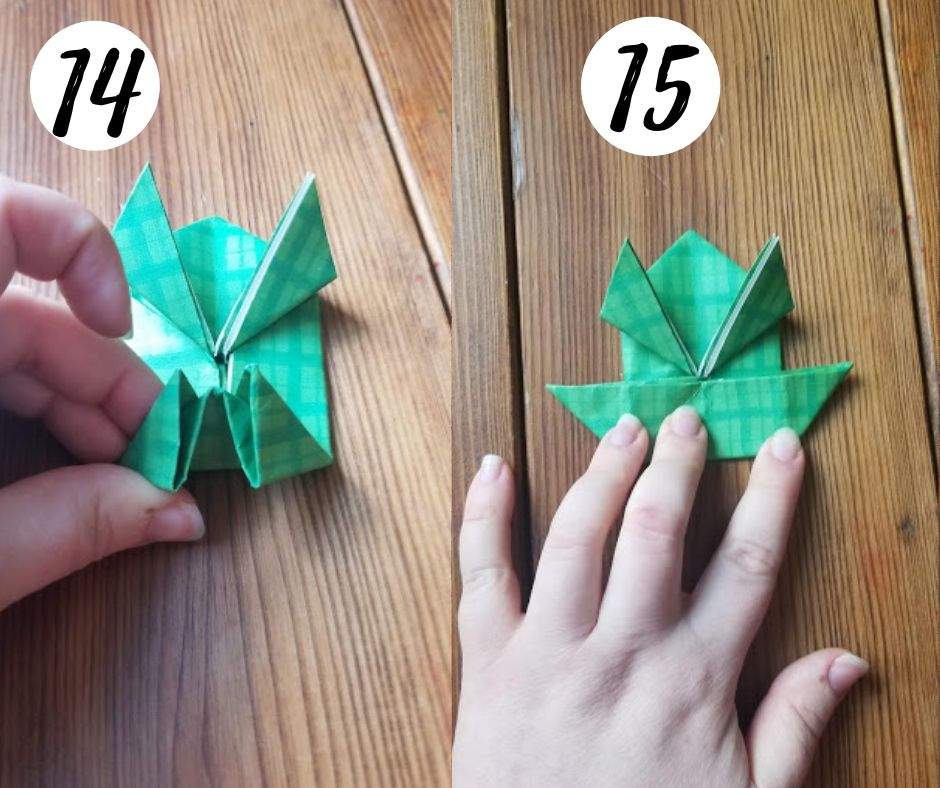
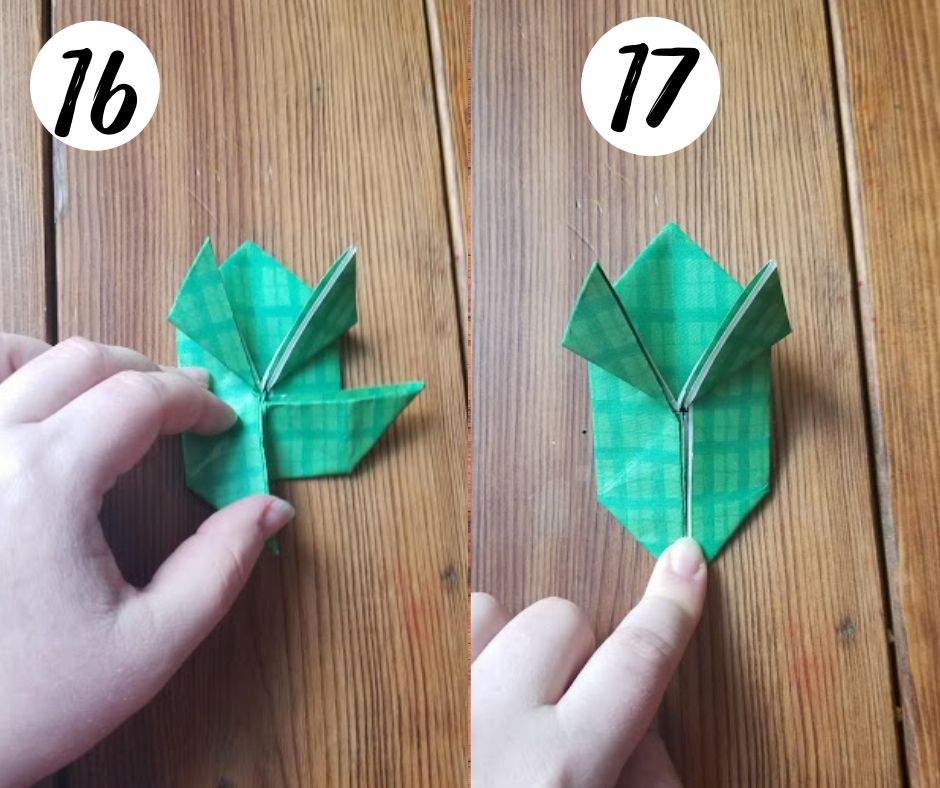
STEPS 16-17:
Pull the edges of the “boat” back towards each other until they meet in the middle. You’re almost there!
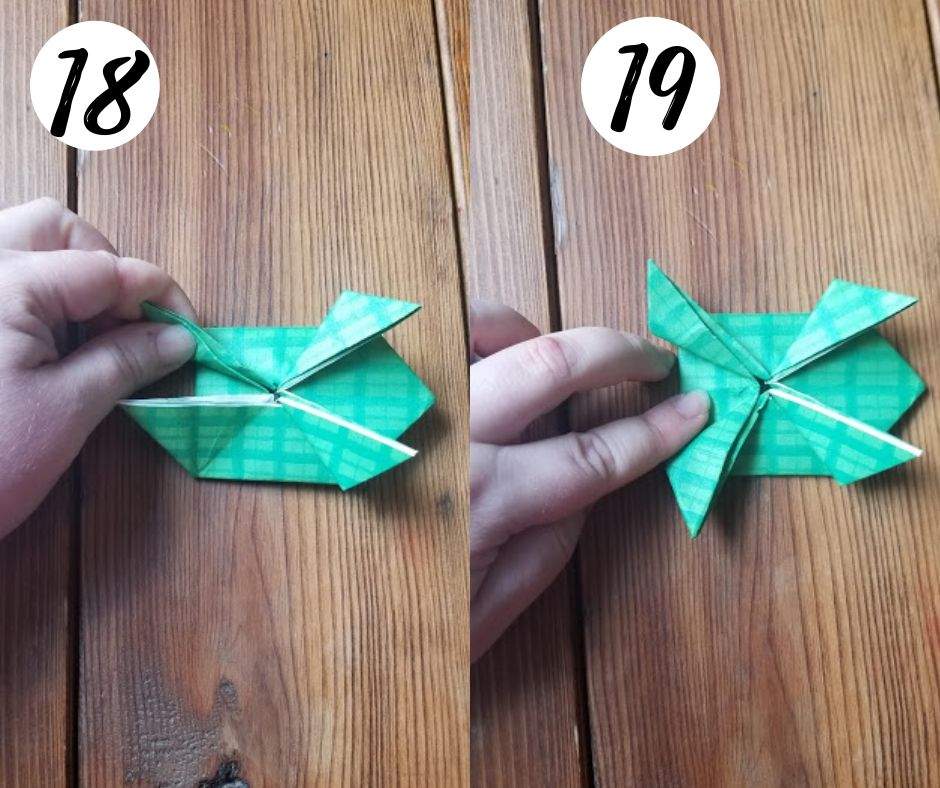
STEPS 18-19:
Now it’s time to form the back legs. Fold the edges of the bottom flaps back to make the back legs. It will be similar to when you folded up the front legs near the beginning.
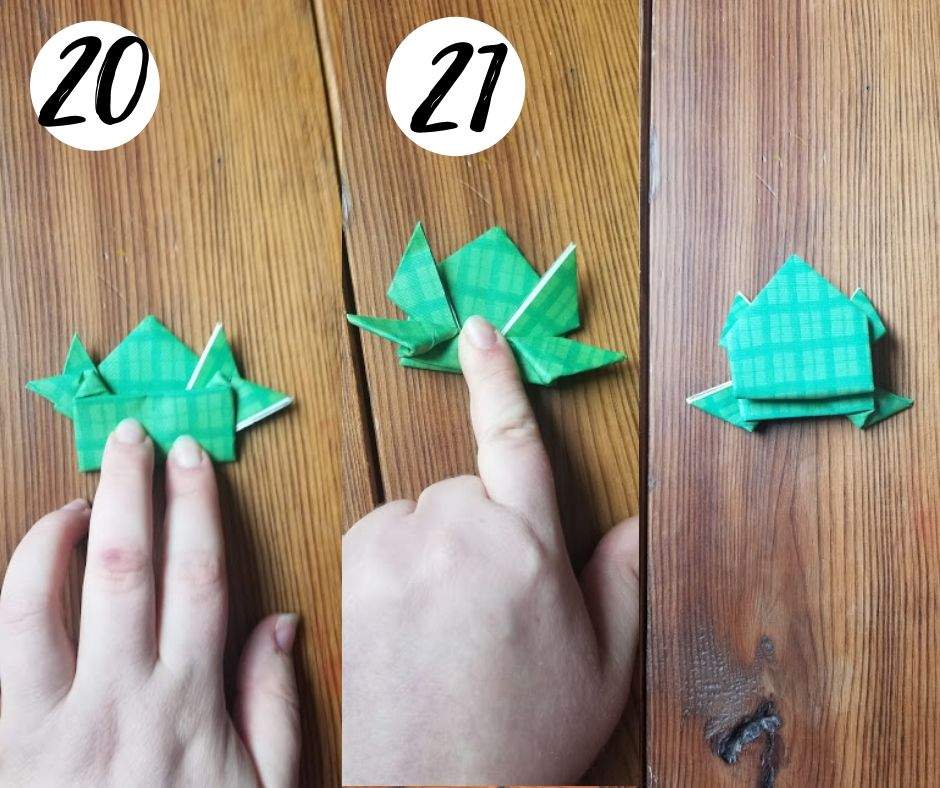
STEPS 20-21:
You made it to the last two folds! This part is difficult because the paper is so thick at this point. But these folds form the springy part that helps your frog to jump. Fold your frog in half upon itself from bottom to top. Next, fold that bottom flap in half again back towards yourself. It will feel ridiculously stiff, but press it down nice and firm and crease it the best you can. Flip the frog over and admire your handiwork!
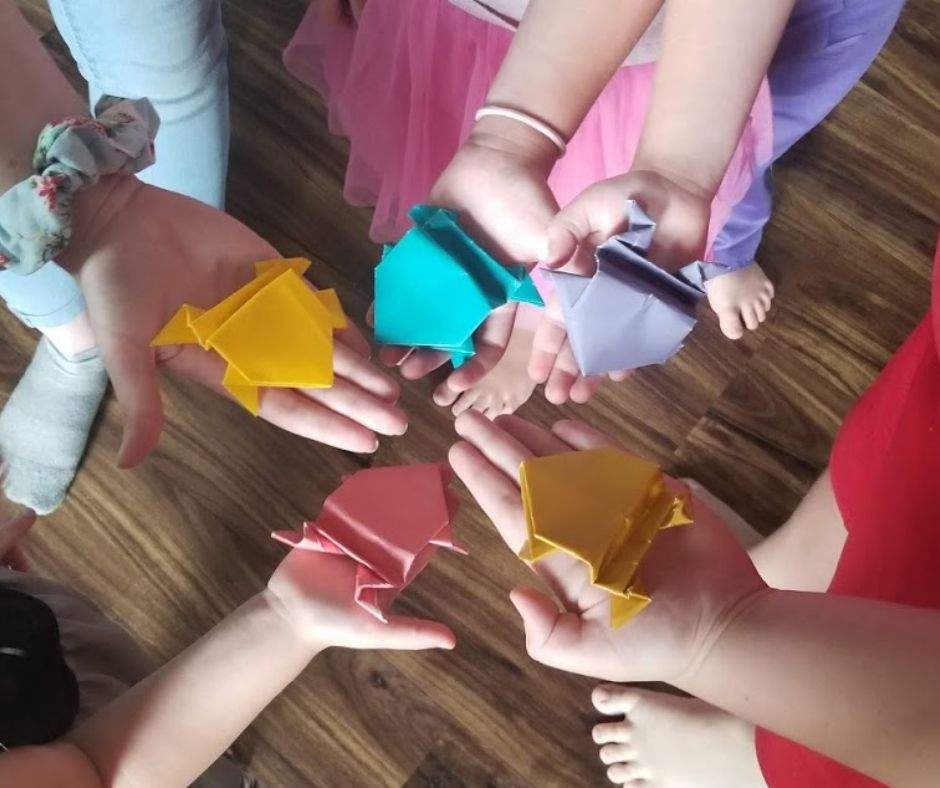
Now you can practice making your frog jump. Push down on the frog’s little rump (like coiling up a spring where that tight fold is) and slide your finger quickly off the back end. You’ll have your frog jumping and turning tricks in no time!
If you’d like to read a Japanese folktale to go with your frogs, I recommend The Two Frogs. It can be found in Andrew Lang’s Violet Fairy Book or at this link.
Thanks for following along!