There may come a time in the near future that anyone who goes out in public will have to wear a mask. Not only to protect themselves, but also to protect others to help prevent the spread of this crazy Coronavirus that is spreading all over the world. I have created a face mask pattern FOR KIDS that are comfortable and easy to make!

My community is working hard to make masks for our health care workers and there are a lot of patterns for masks going around. I have been making a lot of different patterns and have found this Olson Mask to be the mask that consistently fits faces the best. It is also fairly easy, especially after you make the first one.
This mask also has a pocket for a filter. My husband, who is in the vacuum business, is repurposing their vacuum bags and creating 4×5 filter squares to put inside of masks like these. These filters are 97% effective in blocking down to 0.3 Microns. That is really good. You can check this website out to see how you can get you and your family filters.
Here is the video that talks about this mask that I found to be helpful.

I began making these and wanted to make them for my boys. However, as we all know, their faces are smaller. I tried making a wider seam and it still didn’t fit like I wanted it to. I decided to use this pattern as an example and create patterns that would fit kids.
Below, there is a tutorial of how I make them and how I also added a wire (pipe cleaner) to the top of this mask. This makes it so the mask fits the bridge of the nose better. There are step by step instructions with pictures or there is also this video you can watch and follow along.
Depending on the size of your child’s face will depend on what size you want to use. Here are the ISH sizes that are available.
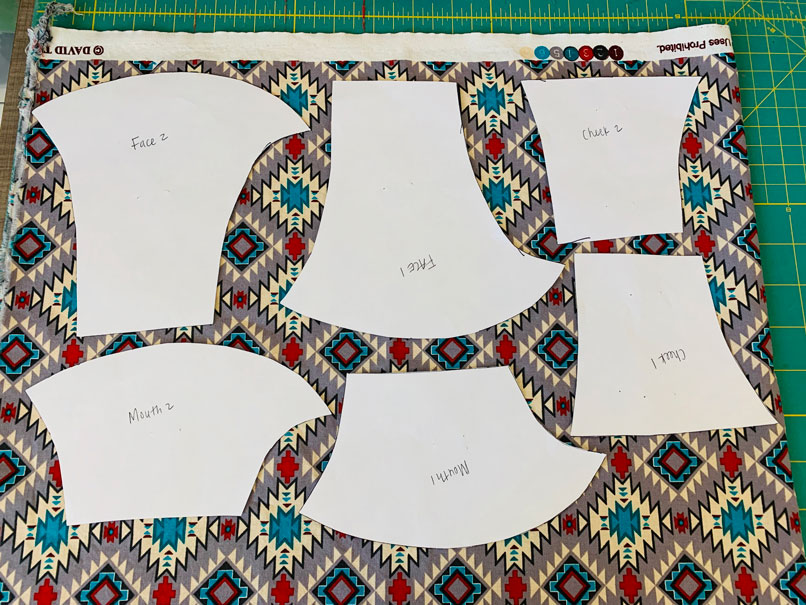
FREE PDF PATTERNS FOR YOUTH MASKS
Mask Youth Baby-4ish – I do not have a baby, but I tried this size onto my 5 year old and it was way too small.
Mask Youth 4-8ish– This fit really well on my 5 year old and my 8 year old. The great thing about this mask is that you can customize it to the face that will be wearing it. I will show you how to do that.
Mask Youth 8-12ish – This mask fit really well on my 10 year old, 11 year old and even my 13 year old. Anything older than this I would just use the adult mask that is listed on the Olson Mask above.

Items you need to make you and your kids masks
- 18″x 12″ piece of fabric – This is You can use 3 different types of fabric if you would like to fancy it up a bit too. I usually buy the precut fabrics by the yard to change up the pattern a little bit.
- Hair ties, elastic, or some kind of bias binding – This is for attaching the mask to your head. Some healthcare workers like the ties better so the elastic doesn’t rub the back of their ears raw. I use hair ties on all of kids because they don’t wear it all of the time.
- Thread – I just use black or white. Nothing fancy
- Scissors –
Step #1 – Using one of the patterns above, cut out one of each shape.
If you have never cut out a pattern before, place each piece on the right side of a piece of material and pin the pattern on. Then just cut around the edges of each pattern.
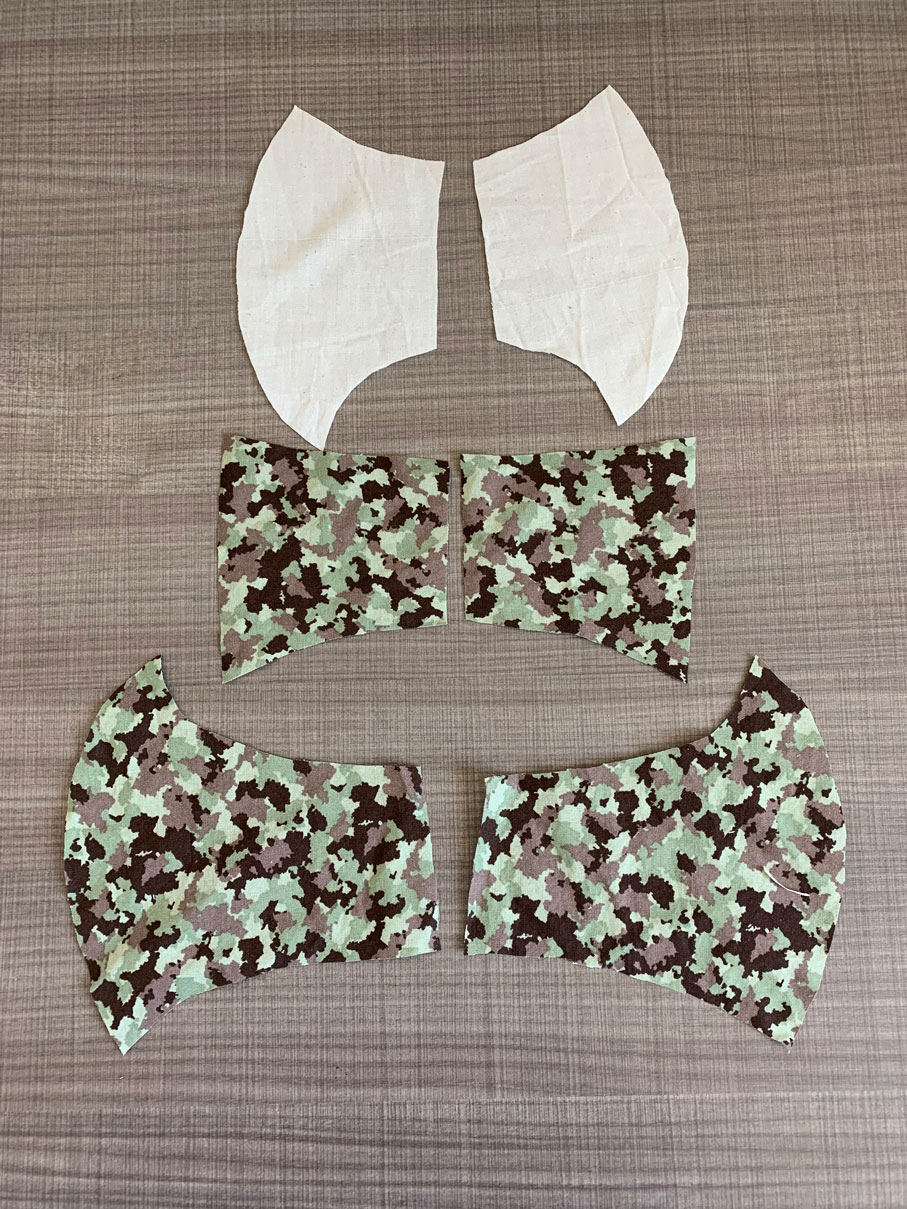
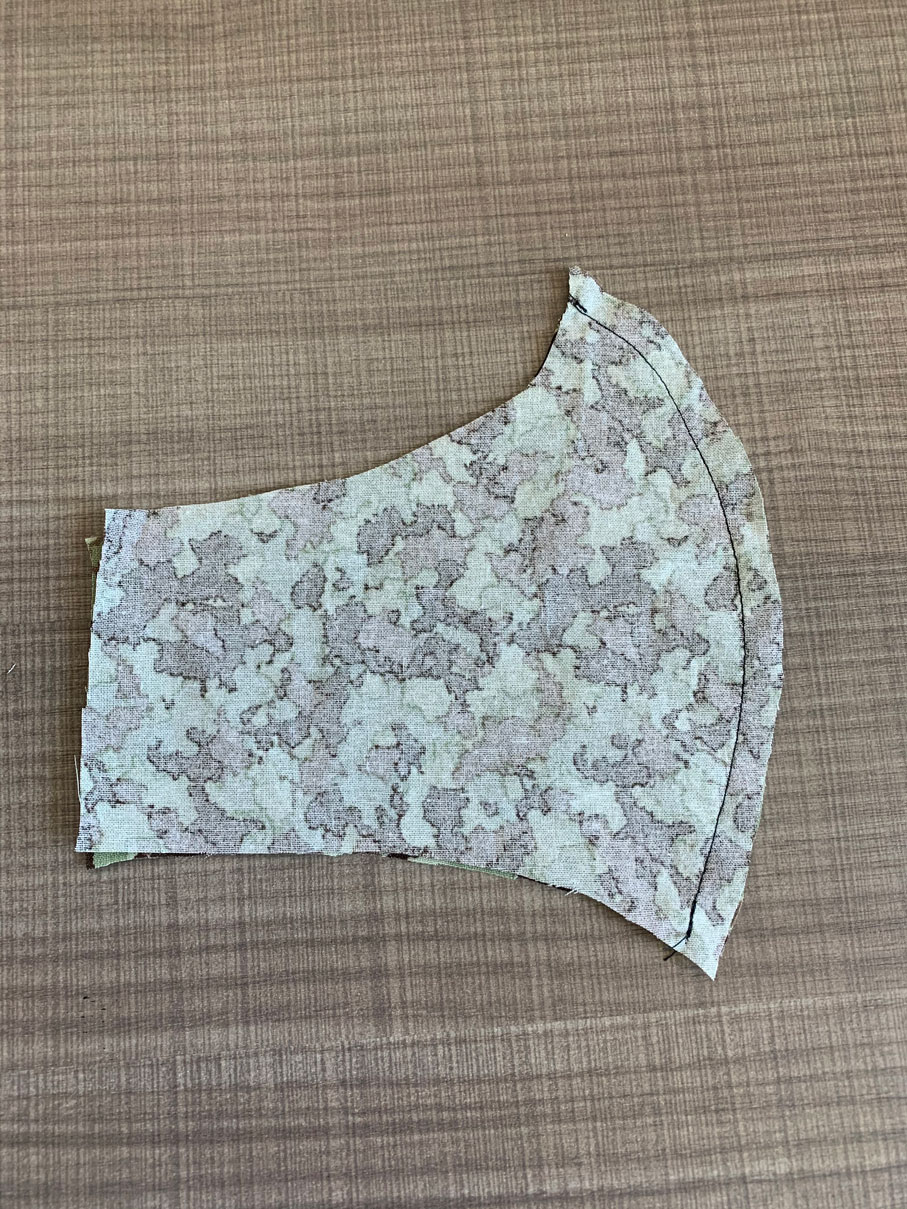
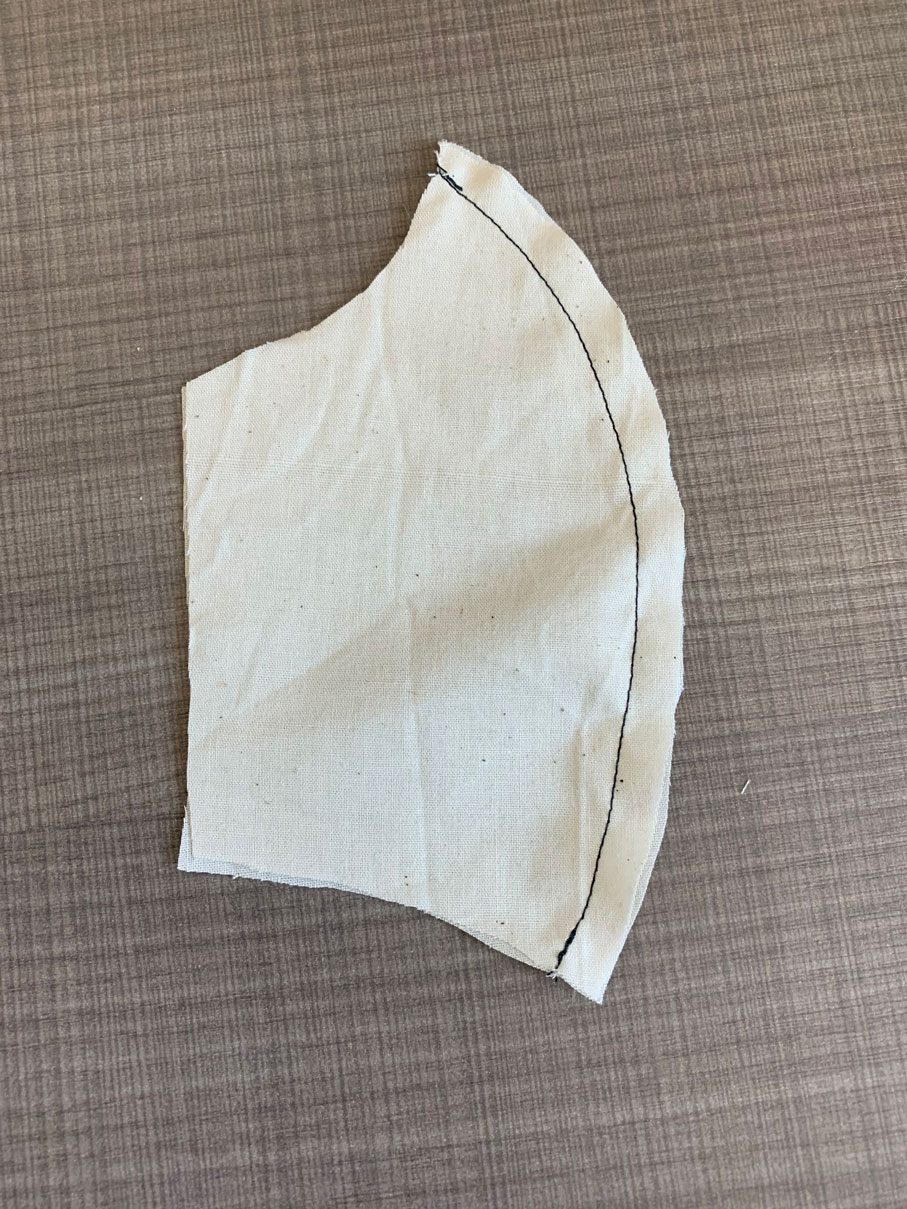
Step #2 – Sew Face 1 and Face 2 together along the curved side as show below.
Remember right sides together.
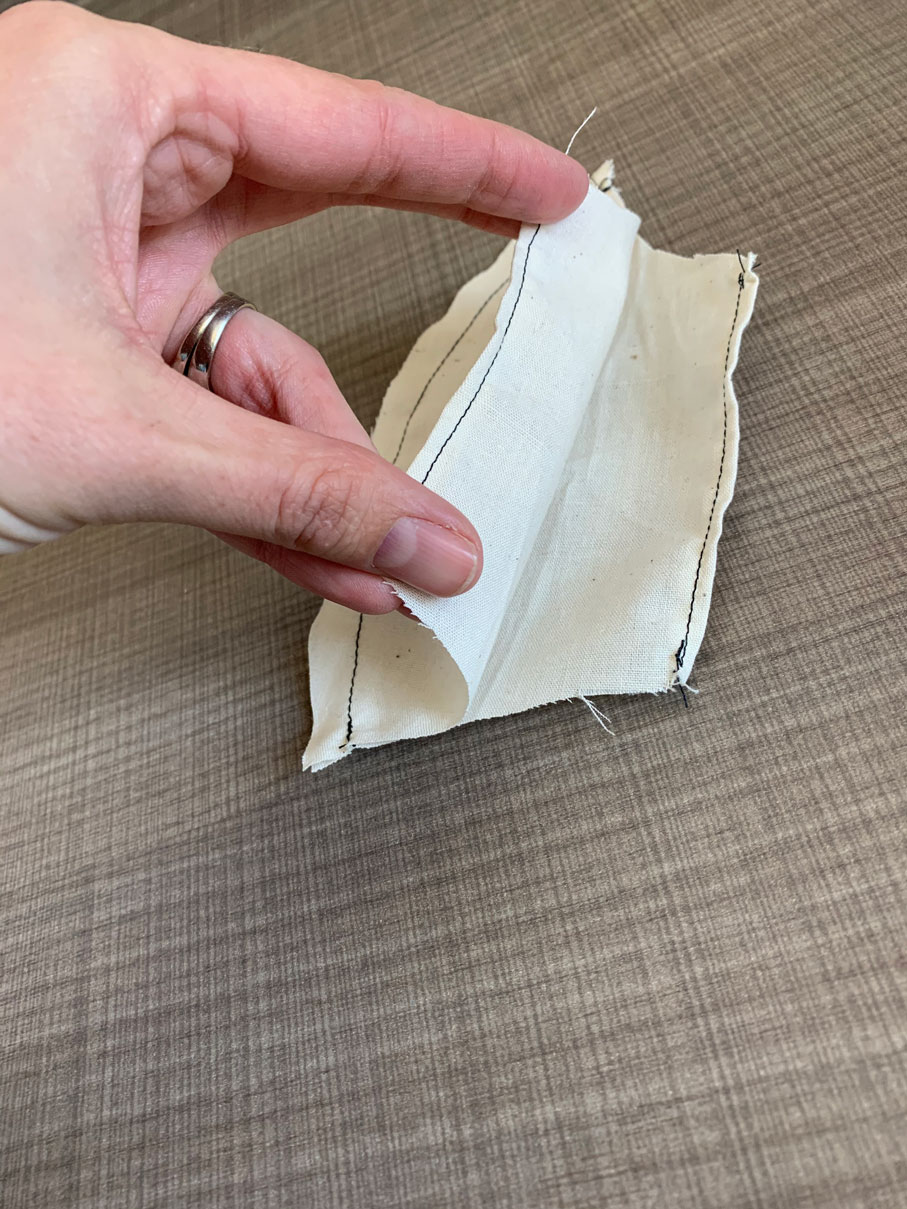
Step #3 – Sew Mouth 1 and Mouth 2 together.
Put the right sides together and sew the long curved side together as shown in the picture below.
Step #4 – On Mouth 1 and Mouth 2 fold and sew the opposite side over 1/4 inch.
Don’t sew them together, but sew them separately.
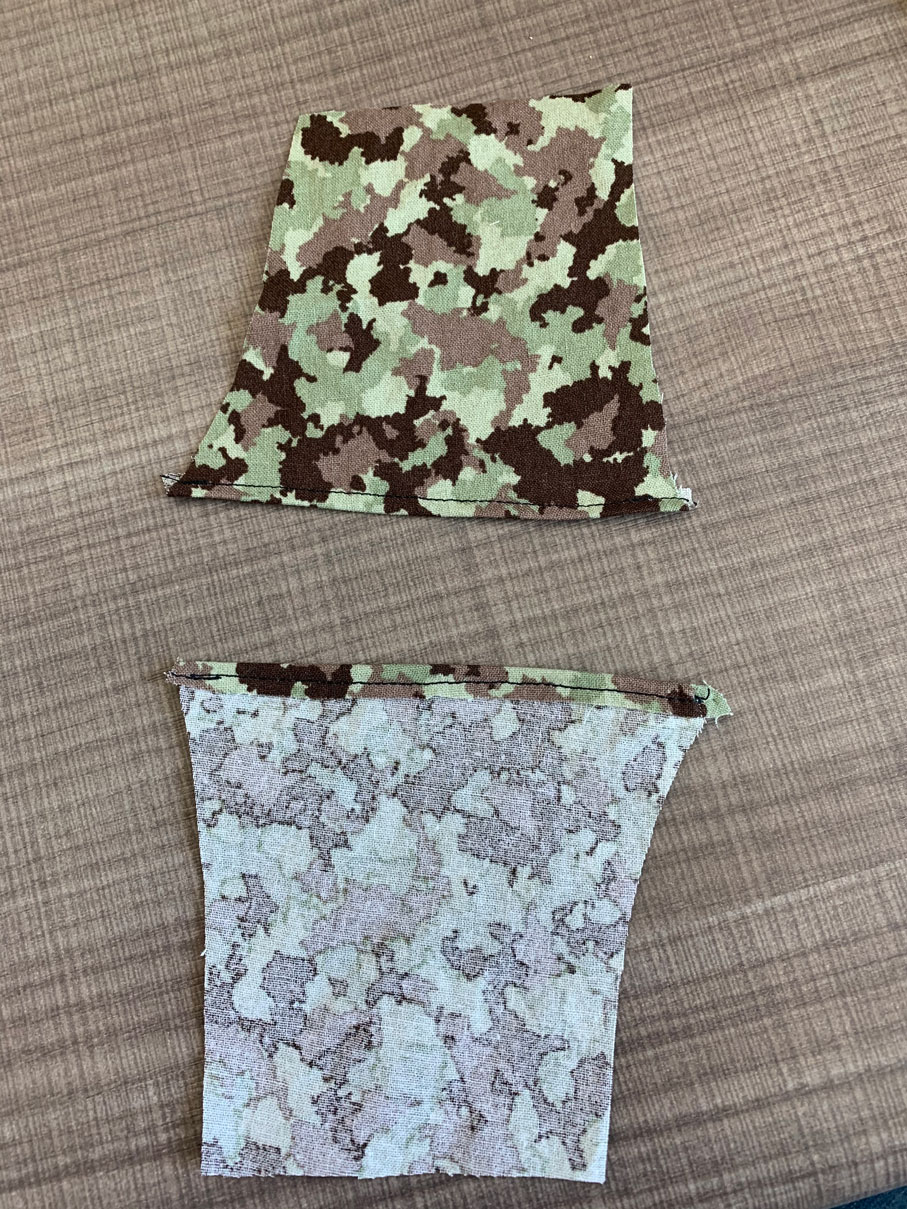
Step #5 – On cheek 1 and on Cheek 2 fold the long side over 1/4 inch and sew down.
Do each of these separate. This just finishes the side so it isn’t a raw edge.
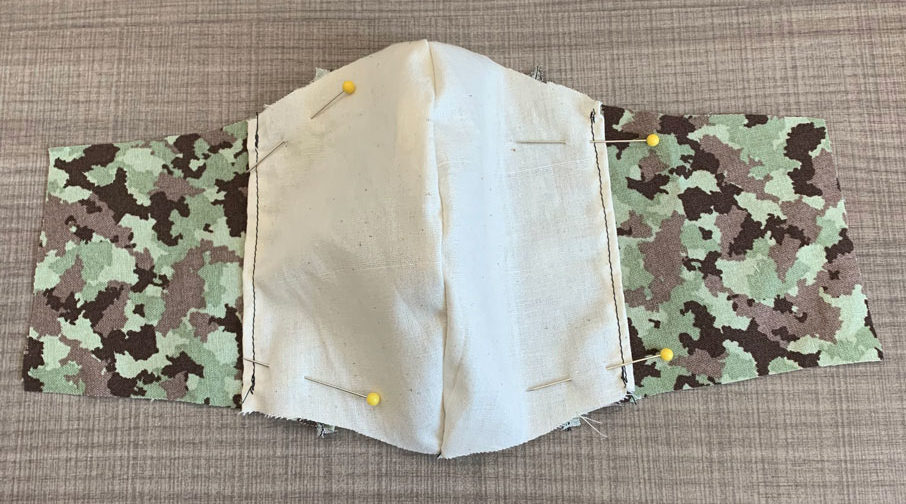
Step #6 – Tack a 1 inch line to attach Cheek 1 to Mouth 1 and Cheek 2 to Mouth 2
This creates one full piece that will be the same size as the Face 1 and Face 2 piece.
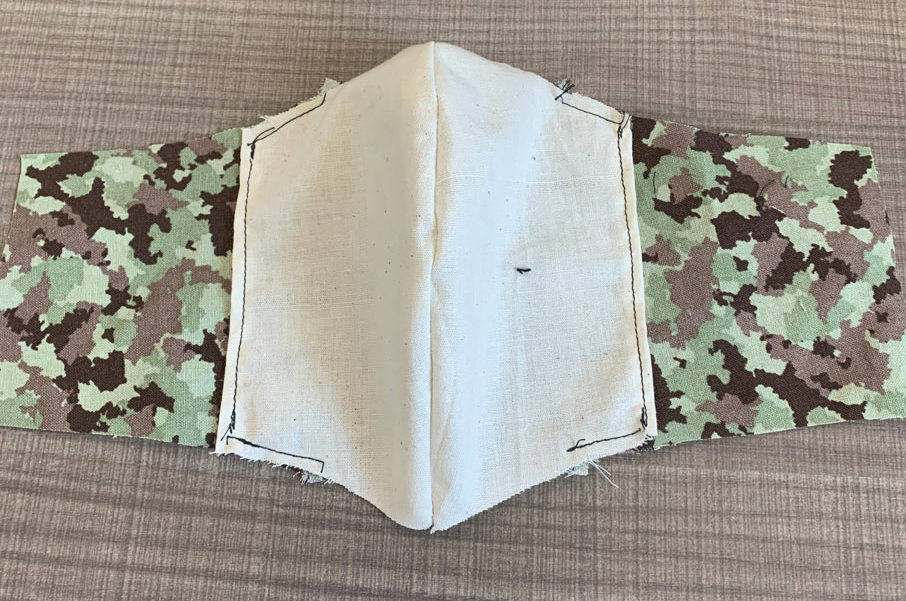
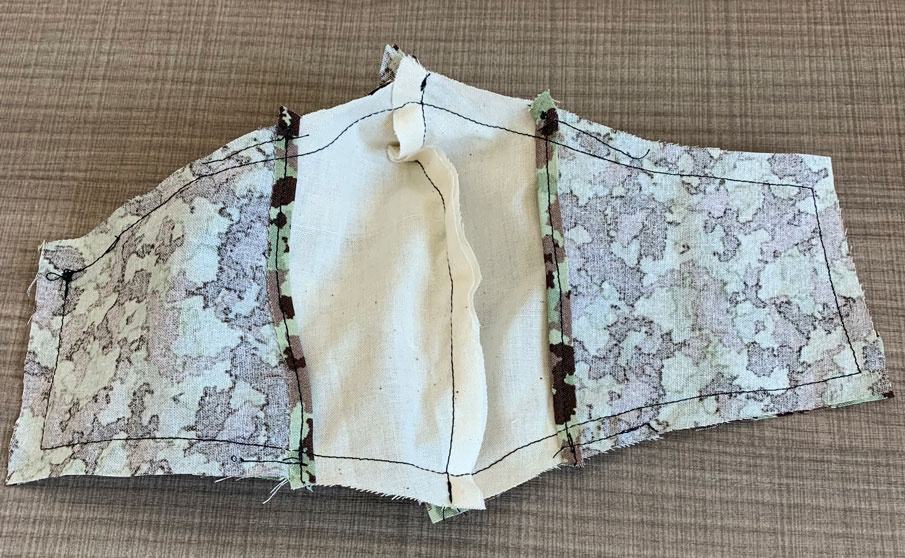
Step #7 – Place fronts of the fabric facing each other and sew along the entire perimeter of the mask.
Here is a picture of the two pieces sewn together. If you are sewing on 4 straps to attach the mask to the head by tying the mask on, this is the step you want to do that. I would cut off an inch off of each end of this mask and then sew in each corner 4 straps so healthcare workers can adjust the mask to their face.
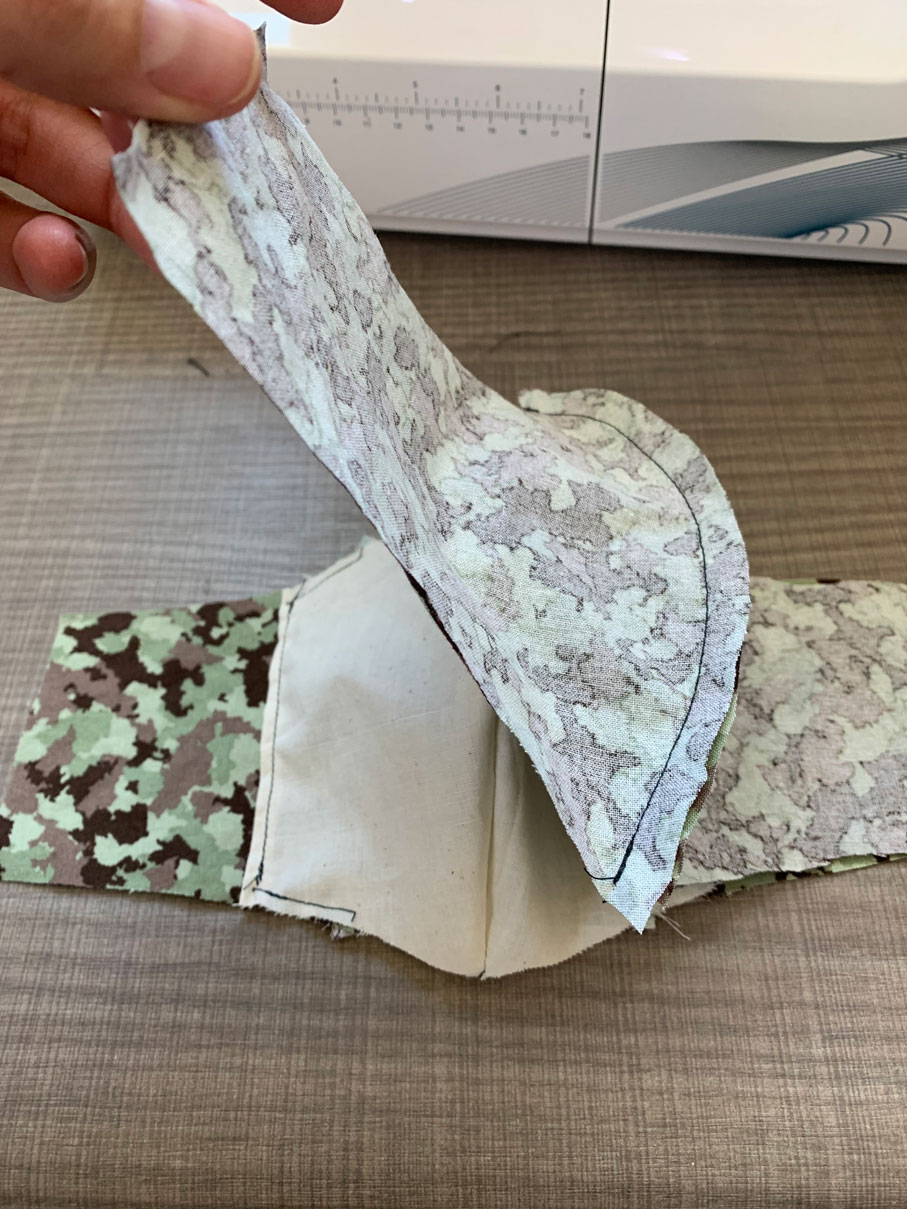
Step #8 – Turn the mask inside out using one of the filter pockets.
If you want to add a wire or a pipe cleaner to the bridge of the nose then continue to step #9. If not skip to step #10
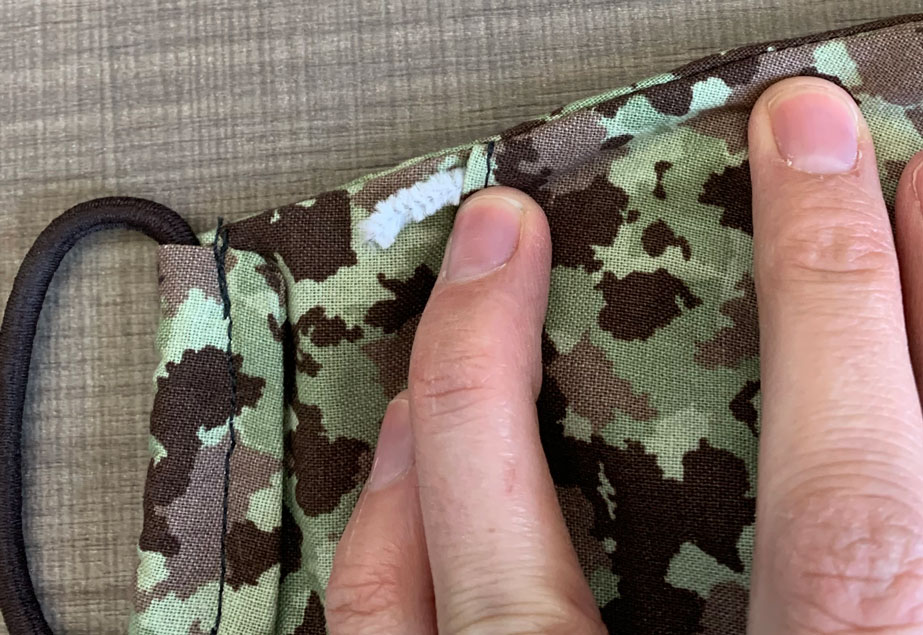
Step #9 -Place the wire or pipe cleaner on the bridge of the nose.
Determine the top of the mask. Take a pipe cleaner and place it inside of the filter pocket and press it against the top seam. Sew close to the pipe cleaner to make a small pocket with the pipe cleaner in it. You will sew through all of the layers of the mask to do this.
Step #10 – Determine how you want to attach the mask to your head.
I use hair ties and attach the hair tie by folding the end over and sewing a straight line. Before you sew it make sure you customize it to each kid first though. I used the Youth 4-8 pattern for my 5 year old and 8 year old, and I folded the flap over more for my 5 year old and it fit great. 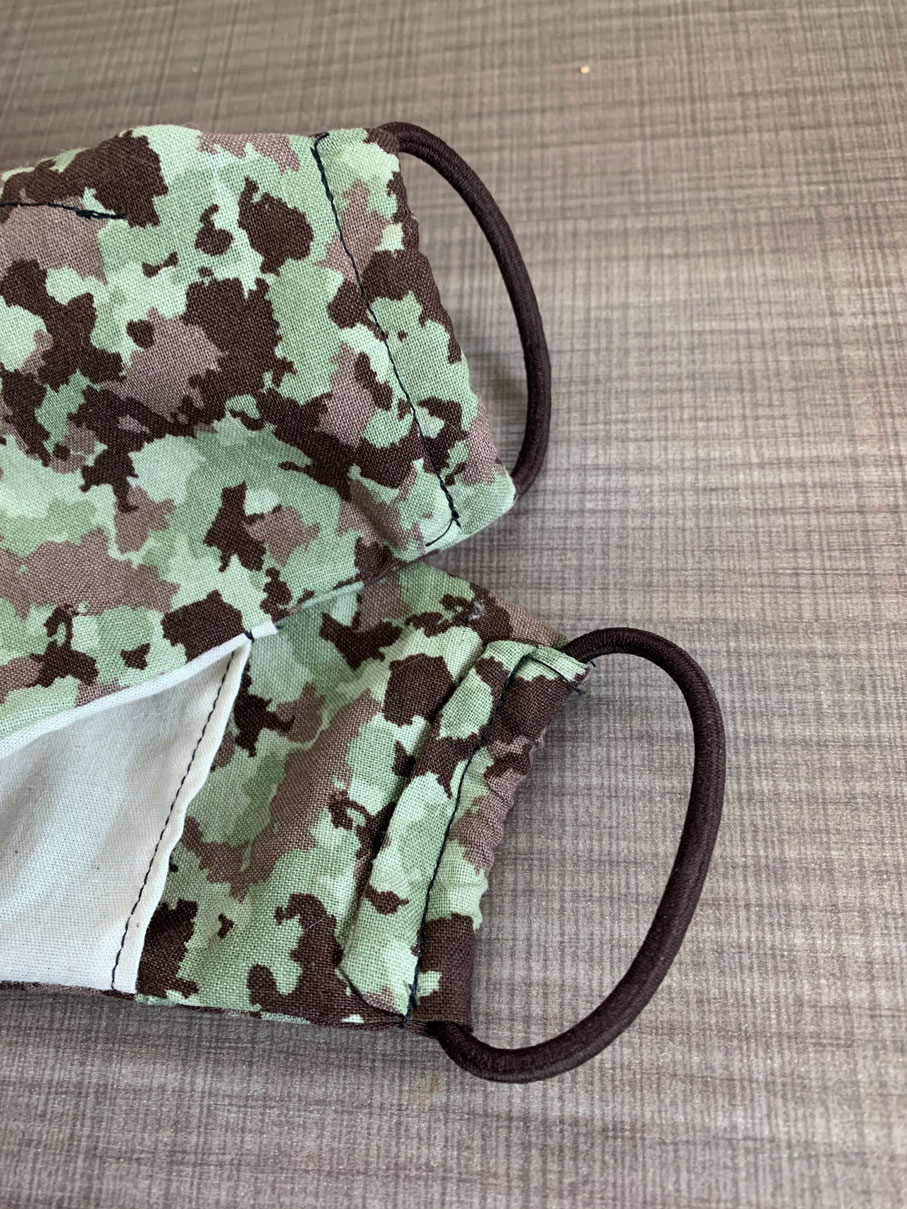
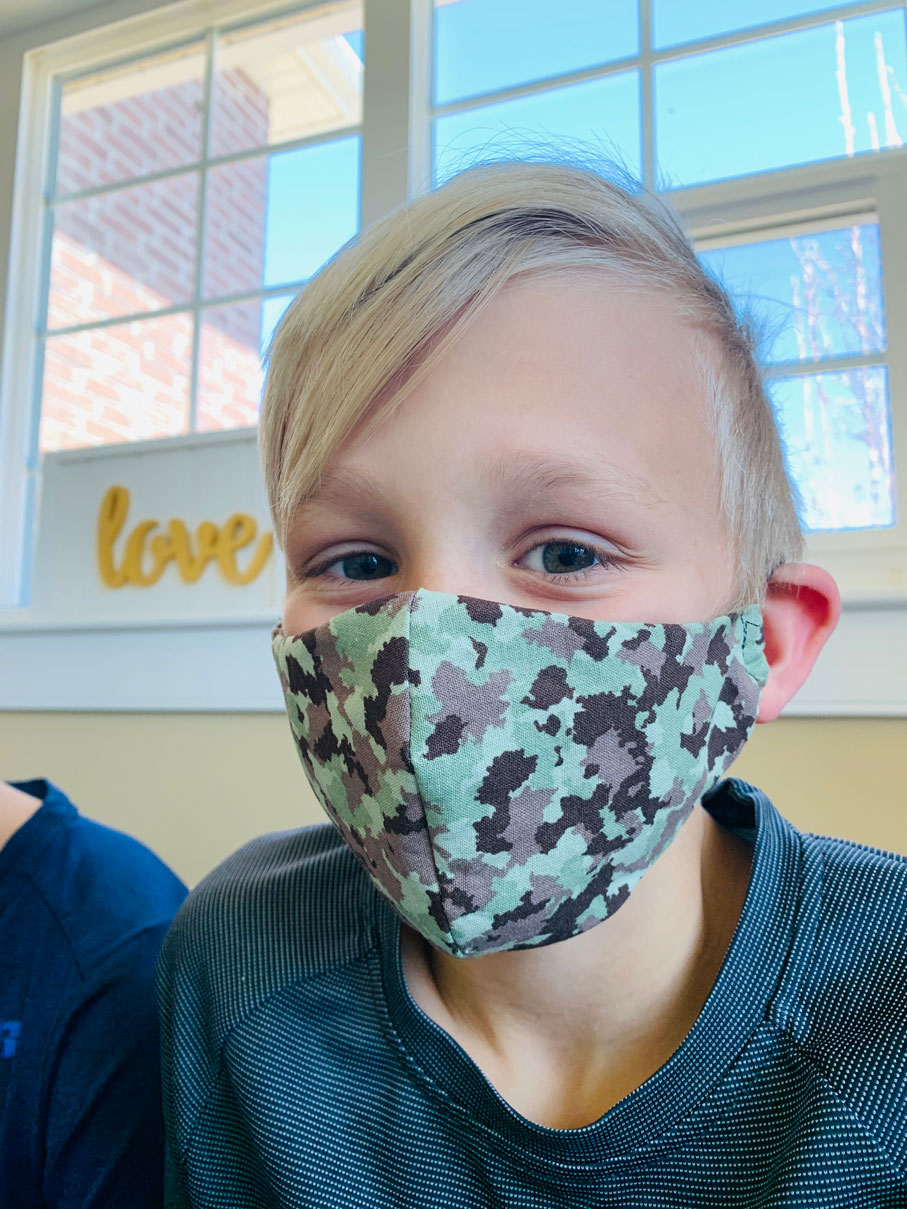
Here is the final product!
If you want to attach ribbon, or a bias binding then you can sew them into the pattern as you do Step #7, or you can just sew it on top. Make sure you reinforce it by sewing it back and forth multiple times so it doesn’t break when being pulled and tied multiple times.